Nobody wants a slow draggy ski or splitboard. Dirt, grit, and all sorts of negligence can sap ski/board speed. Take considerations of ski speed into your own hands and wax those bases up. It’s a relatively simple process let’s get started.


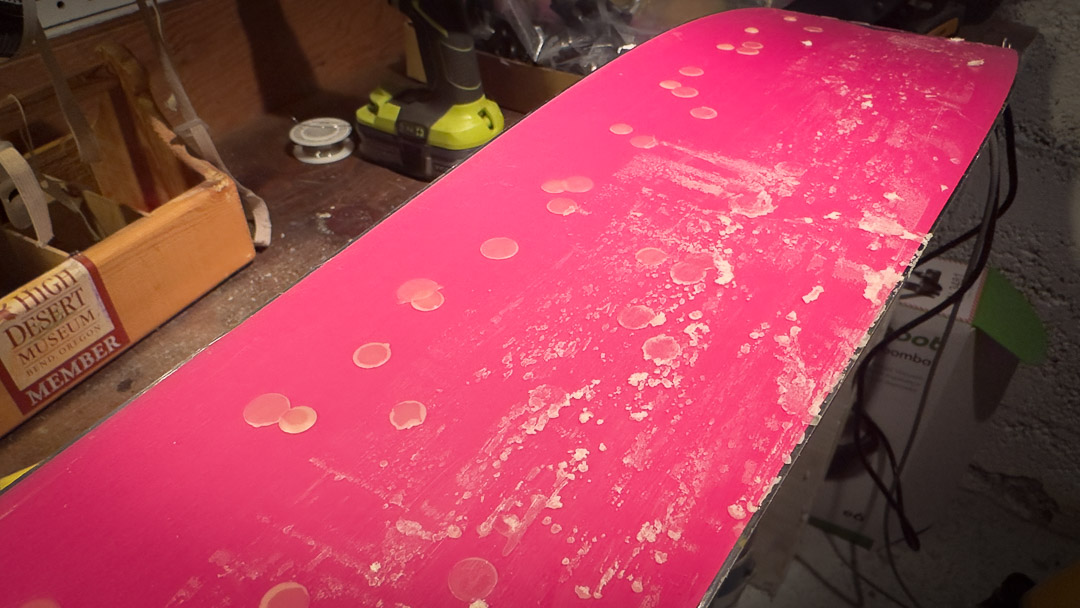
Tools not jewels. A ski is just a ski. Words to live by to a certain extent. Keeping ski bases, top sheets, and edges in good condition makes skis last longer. As far as ski bases and speed goes, do some maintenance, wax-em-up. Then be on your way. We’re not looking for World Cup wax-tech service and mach-one-speed skis like Jessie Diggins often sports. We’re fans of Diggins, but we don’t expect Diggins-worthy skis. Expect and aspire to tolerably un-slow skis. Look at a ski base after ripping skins on freshly waxed bases; wax peels off with the skin.

But wax matters. It helps keep your ski base from drying out, and a proper wax can speed up sluggish skis. Here are some steps to wax your bases without spending too much time on the process. Let’s be real, not too much time. Using the hot wax method, this process could take upwards of 90 minutes, depending on how many layers of wax you apply. Keen on a quick wax process? Check out the 20-minute wax.


Rotobrush. Use for an expedited wax removal process.

The heavy duty root brush setup: Brass and nylon, side by side. Gets the wax removal job done quickly. And we only use a rotobrush outdoors with nontoxic wax or indoors where a vent/hood removes particulate.


Three brushes in the rotation.

Three brushes in the rotation. You can get away with one really. From left to right: steel, medium bronze, and a nylon/horsehair brush.


The Tools

  • Fluoro free paraffin ski wax
  • A sharp plastic wax scraper
  • A scraper sharpener if making the commitment to overall base maintenance
  • An iron. Ski/board specific if possible, which often means a thicker, flatter, and beveled-edge sole plate (the iron’s metal base) and more precise temperature settings. To save some money, buy a used clothes iron, and keep the temp setting in the “cottons” zone, unless using a green wax, which has a lower melting temp.
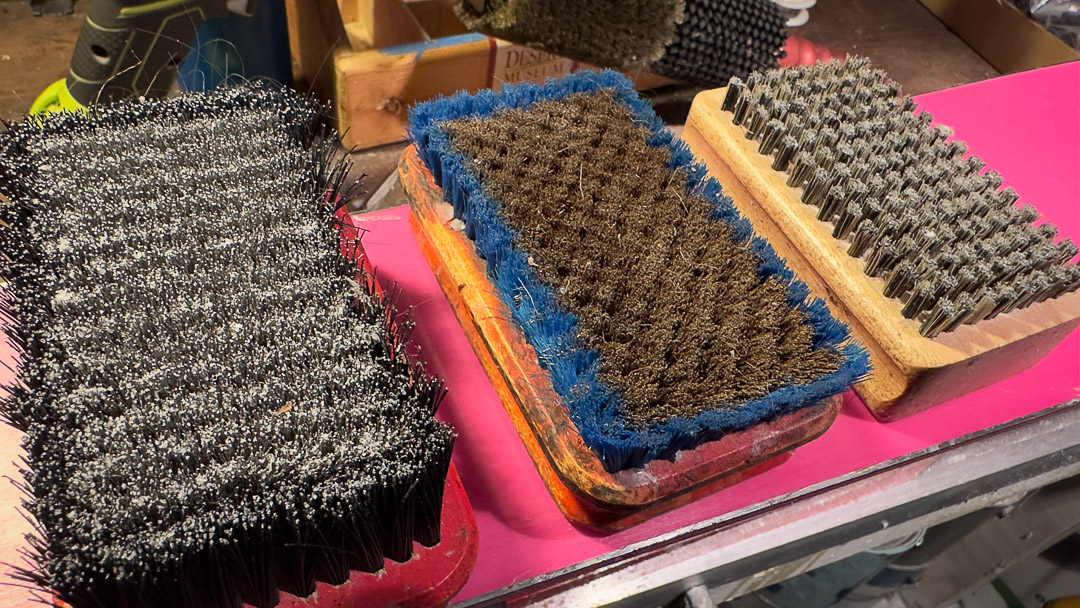
  • Brushes: a brass or copper brush (oval shapes are larger and more efficient but more expensive), possibly a steel brush, and a medium nylon brush for polishing if you get semi-fancy. We’re keeping this simple but we’ll lay out a brush program for those looking for top-end speed in a separate piece.
  • Base file for edge/sidewall dings
  • Gummy stone de-burr edges
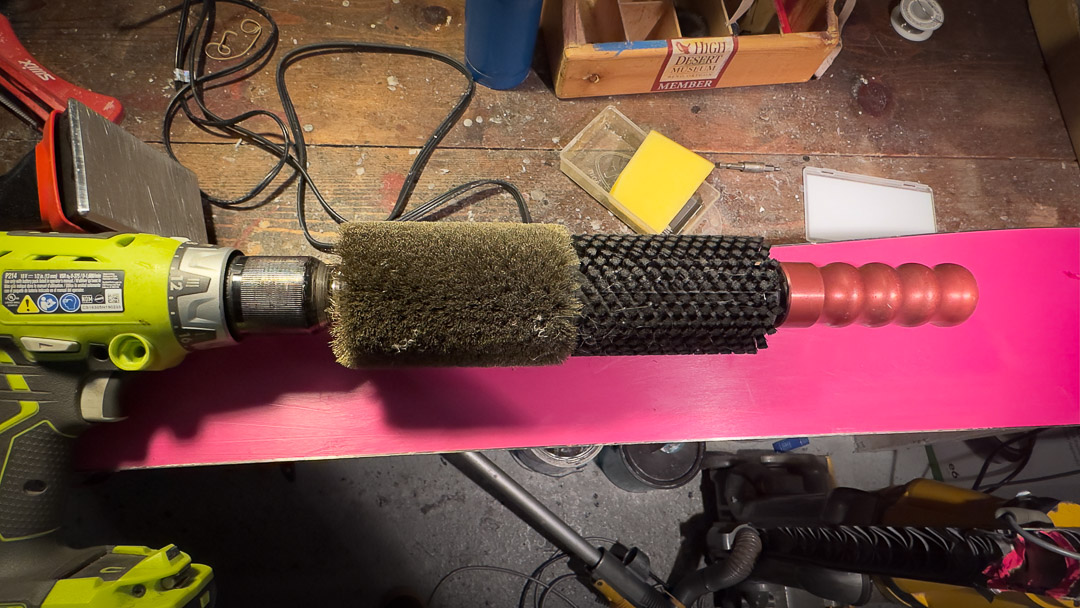
  • Roto-brushes: not mandatory, but-oh-so efficient. Solda, an Italian company, sells cost-effective brushes.


The Quick Tune

Before the waxing take a moment to inspect the edges. If you nailed a rock, nailing rocks happens, do as Doug Coombs does in The Q and P tutorial (quick and painless). Coombs holds the base file at 3-degrees and secures the ski between his legs, and runs the file tip to tail over the edge ding. (Run the file along the edge while the ski base is oriented perpendicular to the ceiling.)  In Coomb’s assessment, remove 80% sidewall, 20% metal for a ~3-degree edge bevel.

Next, with the ski flat on the wax bench and the ski base facing upwards, run the gummy stone (tip to tail) along the edge to deburr.


Waxing Ski Bases: A Step by Step Process

Pick the Wax: Pick a blue or purple wax for mid-winter. Most ski wax companies use colors to indicate their waxes’ proper snow/air temperature. A blue or purple wax should suffice in colder temps. If it’s spring or you expect at or above-freezing temperatures, use red or yellow wax. These are generally softer waxes with higher melting points. If you want to trend into the 90 minute time frame for hot waxing, secure yourself some green wax for damn-cold snow temps. Green wax can be used for aggressive snow (read sharp crystals) and as a means to harden ski bases.

Base Cleaning: If the ski base is dirty from last spring’s snow or you’ve skied across the occasional bare patch, use a citrus base cleaner and wipe the base down. Here’s the process: Douse TP with citrus solvent and wipe the base.

The Cursory Brushing: Channeling your repressed wax technician tendencies (we know you are out there reformed cross-country skiers), use a copper brush or soft to medium brass brush, and running tip to tail, brush out any perceived citrus cleaner residue. Or use a horsehair/medium nylon brush, go for it and brush the base with a back-and-forth motion, you’re not going to tarnish the base.

Apply the Wax: Wax iron owners may have some ideas of the protocol here. If you have a repurposed clothes iron, that works too. Keep in mind two things. You want to keep the iron temp from the point the wax smokes. And you want to avoid burning your bases when touching the iron to the ski base. More on this in a bit. Back to applying the wax. There’s the method of touching the wax bar to the iron’s base and rubbing the heated wax onto the base. Some waxing gurus say this application process conserves wax. The other option is to drip wax on the base. I tend to be a dripper for wider, non-cross-country skis.

(Note: don’t be excessive with the wax, you need a thin film of wax to cover the base.)

Heat the wax into the base. One more time, make sure the iron and wax are not smoking, and don’t burn the base. (Base burning occurs by using a too-hot iron and running it too slowly once it touches the base). Generally, press the iron on the ski base lightly, and run it tip to tail. You want the wax to become molten. Don’t be afraid if you find a hard-to-melt spot (maybe you dripped a too-thick layer on), run the iron back and forth to concentrate the heat. Allow the wax to cool.

A note about green wax. With its lower melting temp, dial up the settings on the iron, and drip. Sometimes melting green wax on the base can take several passes with the iron. As the iron’s temps are elevated, keep it moving, you don’t want to burn the base.

Scrape Wax: Use a sharp plastic ski scraper to remove most of the wax. Again, there’s a pattern, scrape directionally, tip to tail. If you have used green wax, scraping can be a chore.

Brush out Wax: No shame here; raise your hand if you ever forgot to remove wax before a ski, and scraped off as much wax as possible at the trailhead and call it good. Or you never brush the wax out. You are not alone. Another note about green wax: it will take some work to brush it out.

We are not judging spaciness or laziness. Any potential judgment aside, the proper step is to brush the ski base. Wax brushes aren’t super sheep, so sharing some within your community might be the go-to. Once you have your brush, we recommend a basic oval-shaped (they are larger) brass or copper brush. Using a sharpie, draw an arrow on the brush. The arrow reminds us to run the brush tip to tail, and there is a leading edge to the brush. Over time, the brass or copper warps to the tip-to-tail direction, and the brush’s wires will stand up and roughen the base if you don’t lead in the direction of the arrow.

(Note: we prefer to brush skis outdoors and use paraffin non-fluorinated waxes.)

Remove the surface wax by brushing (use the eyeball test to determine job completion). If you have splurged for a medium nylon brush, polish the base with a back-and-forth motion. Polishing is optional in this context. The base will look nice and shiny. Faster, likely not. But you do you.

Many cross-country skiers might have roto brushes. These highly efficient brushes attach to a power drill, and damn, they work great and fast. If you plan on waxing often or are overburdened with manually brushing out a 110mm or wider base, go the roto brush route.

Now slap skins on. Right over the wax job. Rip skins and transition atop the skinner. Your hard-earned waxing efforts, at least cosmetically, will look blemished. Fear not; your boards should run faster, especially in warm or dirty snow conditions.

Repeat the process when ski speed diminishes.

Go glide fast.

Two methods of applying wax (before ironing it in).

On the left side, wax is dripped on. The right side has the softened wax rubbed onto the base. We’ll then run the iron from tip to tail with a few passes to melt the wax into the base.

The wax ironed in.

The wax ironed in.

Plastic scraper to remove excess wax.

Hold the plastic scraper at 45-degrees to the base, and pull from tip to tail. This is the first step in removing excess wax from the ski base.


The Postscript: For those who really want to make it a 90-minute  and not an already belabored 60 minute process.

90-minutes to hot wax skis seems like a long time. It is. But in the time warp of the wax bench, the seconds and minutes can roll by. This is certainly the case if you choose to add multiple layers of different wax. For example, you might add a green layer to harden bases, and top it with a softer wax meant for warmer snow.

If you are adding multiple layers of wax, once the bases are initially cleaned, there is no need to redo that process. Once you brush out the first layer of wax, melt the next layer in, then cool, scrape, brush, and call it good.