Be clear. Be concise. Be prepared for effective backcountry comms.

Be clear. Be concise. Be prepared for effective backcountry comms.


As ski season ramps up in North America (and it is ramping up sharply in places), you’re likely unearthing your radios, dusting them off, and recharging batteries, or at least I hope you are. Radio communications can significantly improve the function and safety of a backcountry touring group, provided they’re used properly. We’ll cover tips and touchstones on how to use your radio like a professional.


As a rookie ski patroller at Park City Mountain, I remember a medical call that another rookie responded to. A skier had fallen off a cut bank onto a road and was reportedly in pretty bad shape. We were waiting near the bottom of the run with a snowmobile to assist transport to the base clinic and a waiting ambulance, hoping for a situation report. The responding patroller came on the radio, flustered:

343 for 304 do you copy…but there’s…I need a few…[heavy breathing]…. he’s about 30, seems shocky, probably going to need an ambulance. We’re near turn two on….and also oxygen…[more panting].”

Her transmission was disorganized and broken, and even though she tried to describe the situation and her needs, we didn’t receive useful information from the call, which lasted minutes, preventing anyone else from transmitting on the radio.

304 for 343, stand by. We copy, 30-year-old male in distress, ambulance requested. Say again your location and what you need. 304 clear.”

Our team lead finally broke in and calmly and slowly took control of the situation. He made it clear what we knew and what we needed to know. His example was a solid illustration of professionally executed two-way radio communications.  

The amateur world is more lax, as it should be. But, as a radio user, there’s nothing worse than ending up with another group on your radio channel who won’t stop talking. Talking about the weather. Talking about last night’s trip to the bar. Talking over each other. Nonprofessional radio use doesn’t just take away from the effectiveness of radios, it can be a distraction unto itself.

The following tips are ones that I have compiled over multiple years of working with different ski patrols and rescue organizations, with a few bonus tips for FRS radio users. This is not a definitive guide to radio use, and there will likely be some variation in personal preference and regional variation in radio use. However, any system is better than none, so here’s my process for radio success from car to bar.


Use a High-Power Channel

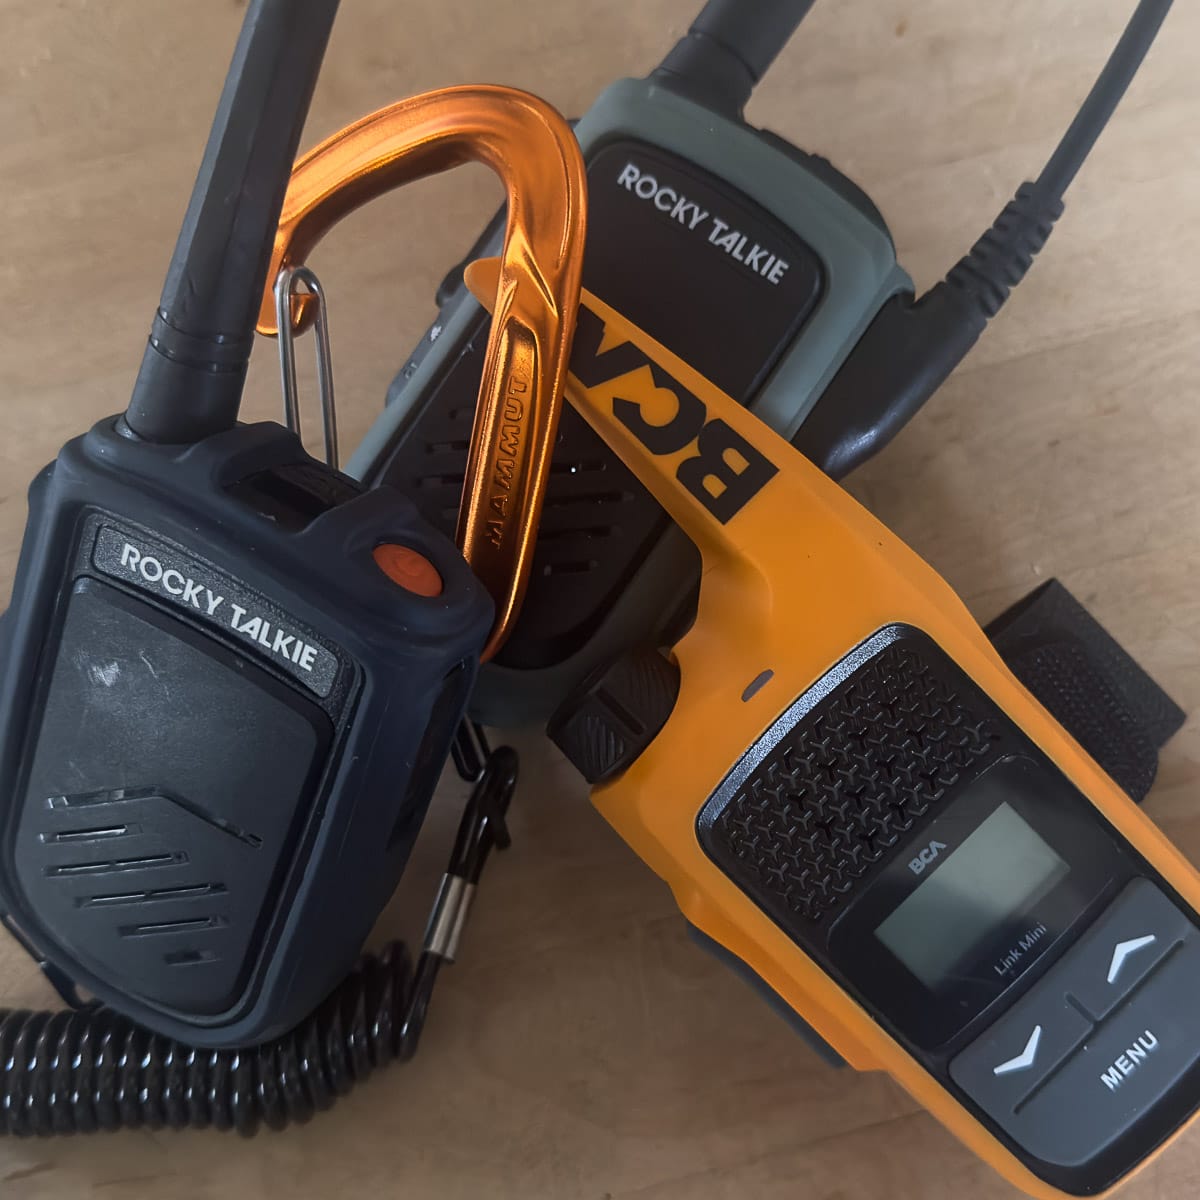
Did you know that your FRS radio has different transmitting power depending on what channel you’re using? That’s right. Your BCA or Rocky Talkie transmits at either 0.5 watts or 2 watts, depending on the channel, Which is a 4x power difference! Channels 1-7 and 15-22 will give you access to those 2.0-watt transmitting powers. These same channels will give you access to 5-watt transmitting power if you’re wise enough to use the Rocky Talkie 5 Watt GMRS radio.

 

Pick a Privacy Code

Picking a channel combination that ends in 0 is a recipe for disaster. Program your radio to FRS channel 5, privacy code 0 (5-0), and your radio will monitor all transmissions on channel 5 across some 155 privacy codes. When you transmit, you’ll be transmitting only to radios on 5-0, but you will be constantly bombarded by traffic from other groups. This problem is compounded near ski areas where families with blister-pack radios jam the airwaves chatting about cocoa breaks. Also, avoid the three most common choices, 5-10, 4-20, 7-11, and you should have a clear channel for your coms.


Be Aware of Consensus Channels

In some high-use areas, like the central Wasatch mountains in Utah, established consensus radio channels allow inter-group communication as needed. Rocky Talky has compiled these channels for Utah, Wyoming, Colorado, Washington, and New Hampshire here. Do not use these channels for routine communication. Instead, set up your radio to monitor the consensus channel as you transmit on another channel. Use these channels only if you are trying to communicate with another group in your runout or if you need assistance.


Mic Check

This should go without saying, but a radio that is not charged, on, and set to an appropriate channel and volume is not useful. Make it a part of your beacon check process to also check your radio and ensure that all group members can transmit and receive. For example, Steve, accidentally, with the radio on channel 10-0, will be able to hear Angela transmitting on channel 10-4 but won’t be able to respond. Make sure transmissions flow both ways.


Me Calling You

Having a standardized way to convey who is calling whom on the radio is good. Hailing your intended party before speaking at length also ensures that you will be heard. “Me calling you” is a common format for this process.

Patrick for Jason.

This is Jason, go ahead.”

Jason, let’s regroup on the shoulder to discuss our route.”

Some groups use a “you from me” format for these calls, but I prefer “me calling you,” as the most likely part of a transmission to be clipped is the first word; using “me calling you,” Jason still hears his name and knows he’s being called.


Take a Breath

In almost any scenario, you can pause to take a breath or two before transmitting on the radio. You will be clearer and more understandable, which also helps to maintain a group’s function even under stress. In some organizations, it is viewed with both amusement and alarm if someone comes on the radio panting and short of breath. Either this is an amateur, or the situation is now in extremis. This pause will also let you briefly gather your thoughts so that your transmission can be short and precise.


Key Mic, Pause

This follows from “Take a breath.” Every radio I’ve ever used has a pause of about 1 second between when the mic is keyed and when it is transmitting. If your radio has a transmit tone set, such that it beeps when you key the mic, this helps to remind you of this pause and lets you know you’ve actually keyed the mic. Key the mic, let the beep pass, wait a beat, then speak. Otherwise, the start of your transmission will be clipped.


Say Only What is Needed

This is the golden rule of radio communication. You should treat your radio as a safety tool, not a toy. That means idle chatter about the weekend should be reserved for the top and the bottom of the run or on the skintrack. When communicating something to your partners, do so in as concise and precise a way as possible. Any time you spend speaking on the channel is when you’re potentially “stepping on” everyone else in the channel and preventing them from speaking. While you talk about how amped you are to drink your homemade kombucha, someone else may be trying to transmit to the group about the avalanche that has just occurred.


Say What to Do, Don’t Say What Not to Do

If you are trying to instruct someone on how to avoid a hazard, find better snow on the ski run, or find their way to you from their location, you should use positive language explaining what to do. This avoids the pitfall of an incomplete transmission: 

Mike, for Lucy. Lucy, there’s some windslab present that seems sensitive. Don’t go skiers, right.” 

When the signal cuts out and the word “don’t” fails to reach Lucy, you’ve just told her to do the opposite of what you wanted. “Lucy, there is windslab, ski left of my track,” avoids that risk. If communicating a need for immediate action, repeat for clarity. “Avalanche, ski left! Avalanche, ski left!


Useful Plain Language

I’ve worked for a ski patrol that used 10-codes, an outdated system of EMS radio communication that some people still think is cool. The problem is, it sure takes a while to figure out what people are talking about.

Yeah 10-4 Mike, can you 10-10? I’m 10-9 on my way to the 10-14.”

Great, now we all feel like Hollywood 5-0, and nobody knows what we’re talking about. I recommend against using 10-codes, but there are a few radio-specific phrases that are useful:


Copy: I received and understand your transmission. A phrase illustrating understanding should follow it. “Copy that, Jason; we will meet you at the road intersection to regroup.”


Break: I have more to say, and I’m stopping intentionally for a moment. You haven’t lost me. Often useful for providing a patient report or longer transmission. “The patient is a 34-year-old male with a lower leg injury, vital are as follows, break“…”heart rate is 94, blood pressure….


Say again: I didn’t understand, or the transmission was broken. “Say again, Jason, transmission broken.”


Go ahead: I hear you, and I’m ready to receive. “Jason for Patrick.” “This is Patrick, go ahead.”


Stand by: I hear you, but I’m not ready. “Jason for Patrick.” “This is Patrick; stand by“…..”Go ahead, Jason.”


Over or Clear: Marks the end of a transmission. It is not always needed, but it is useful if transmissions are long, such as when using “break.”


Summary

You’ll rarely go wrong using your radio if you slow down, say as little as is needed, and then quiet down so that you can hear the response. Don’t be the human JammyPac spreading the noise where it’s unnecessary. Help educate your partners on good radio habits, and you can operate like a professional and ride more powder safely.

If you have other radio tips, tricks, or habits that you find useful, please share them in the comments, and then charge your radio.