
Grizzly.Ski Bindings Overview
Grizzly.Ski opened their doors and launched their new concept of pin binding design in 2017. Thinking back, 2017 was a different era in tech bindings in the US. Dynafit still had a stranglehold on the market in the US, ATK was still a mysterious euro brand that one had to order from overseas, and the plethora of super capable, sub 300g bindings like the Salomon MTN and Marker Alpinist were just starting to hit the market. Pierre Gignoux/Dynafit, titans of the race industry had just released the radical RC1 binding with a full carbon toe piece at 66g. In that context, new kid on the block, Grizzly.Ski launching a 58g racing binding made with aluminum and steel seemed both bold and wildly innovative.
Fast forward to 2020 and Grizzly had won an ISPO award with their Olympic binding, a more touring oriented model using the same “side hinge” toe piece concept, as well as many other innovative ideas. Between the award, and the trendsetters at Skimo.co beginning to import the brand to the US, they have been on the radar of many of us gear nerds for a few years now.
These days, Grizzly has a relatively full line of lightweight touring bindings. From the lightest in the world GR 48 racing/vertical binding (can you ski downhill with that thing?!) to the GR Olympic Tour, with multiple riser options and adjustable lateral release. AT first glance, the line can feel a bit overwhelming— basically, there are three toe designs and three heel designs that you can mix and match to get different weights/features. For toes, there is the race toe with no brake and no release, race toe with brake and no release, and Olympic toe with release and brake. For heels, you have the three-screw race heel, 4 hole race heel with lateral release, and Olympic tour heel with adjustable release and multiple riser options. The “II” models add a 10mm “microshift” length adjustment in the heel.
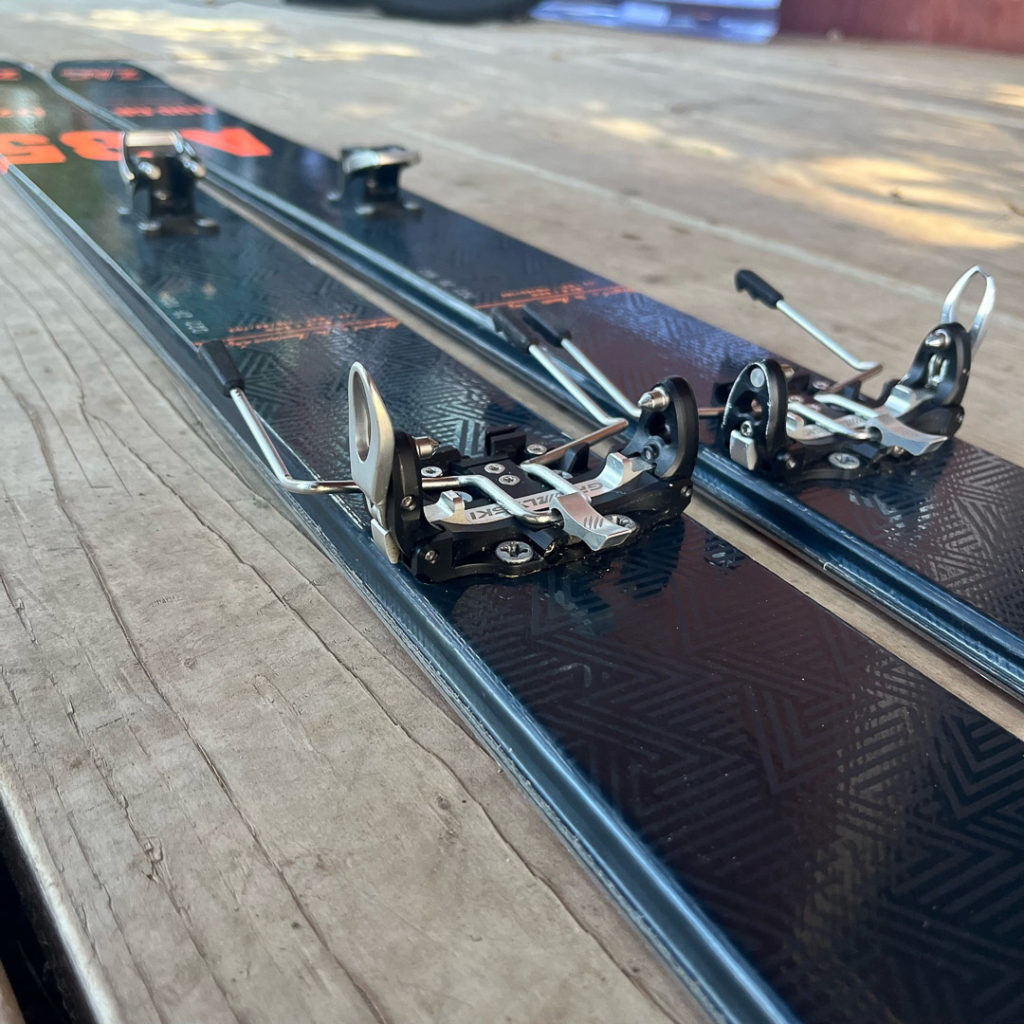
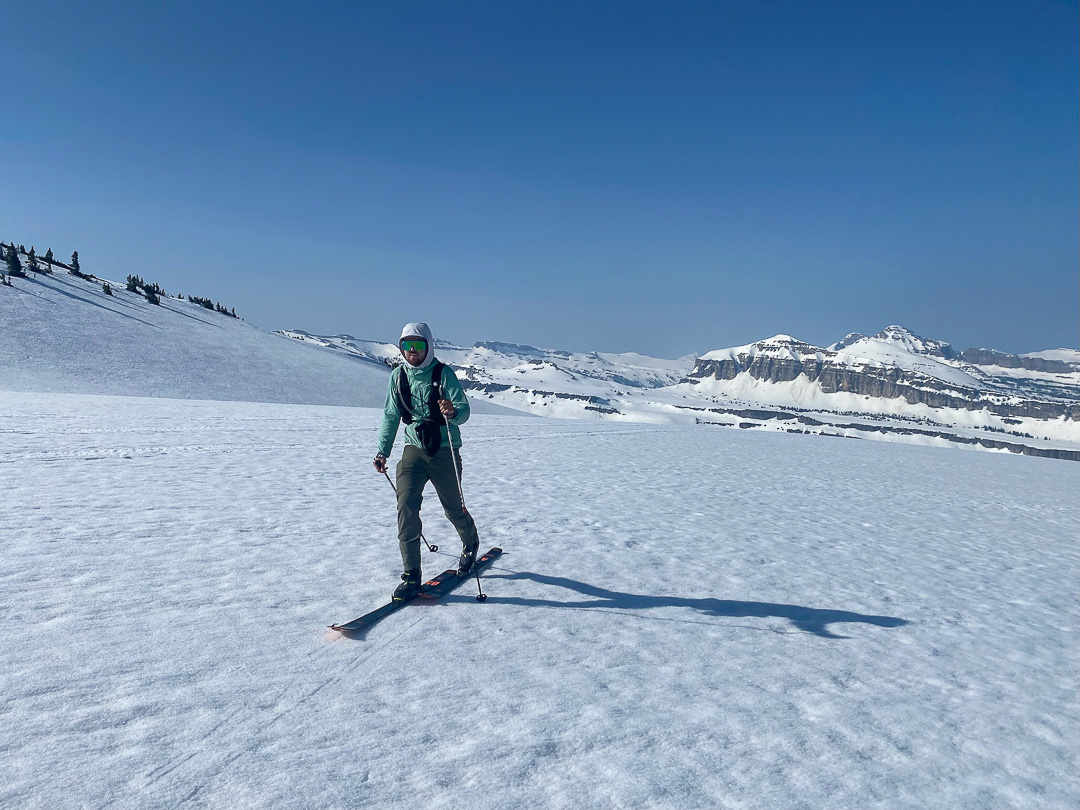
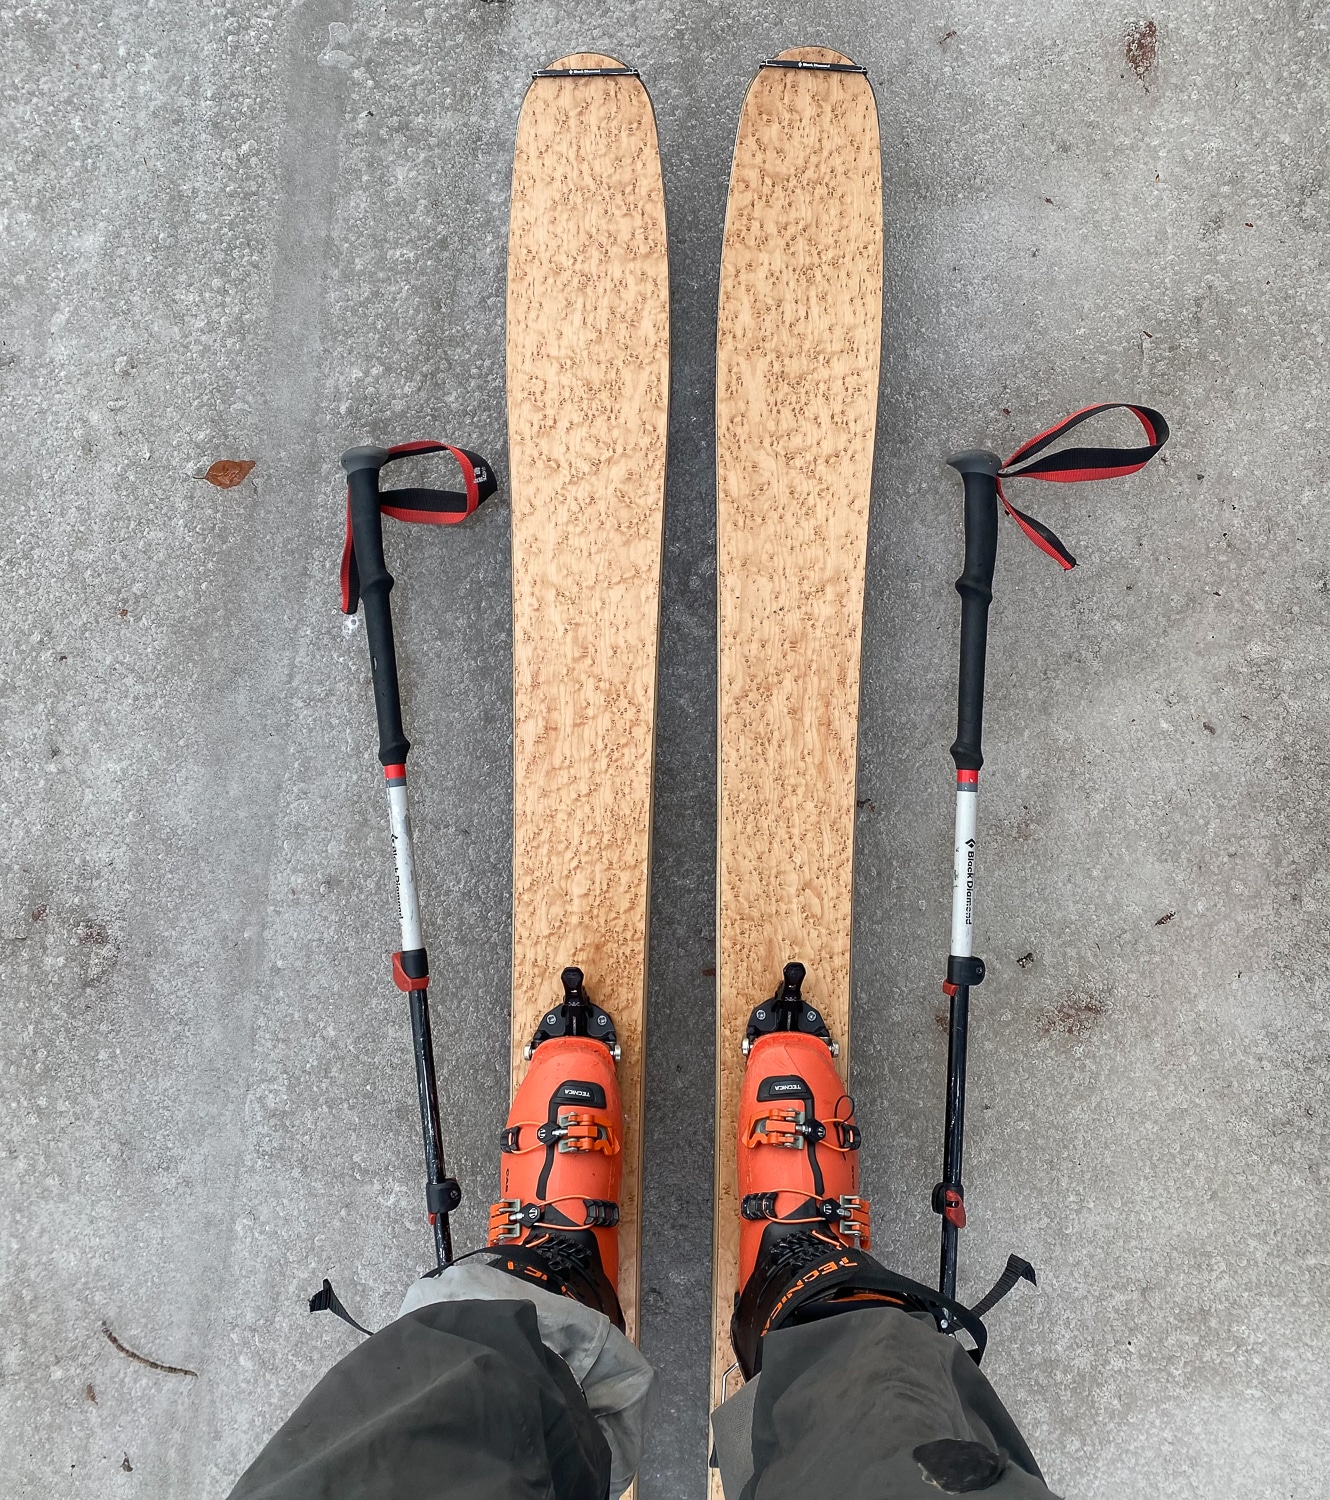
I decided on the GR Olympic II for this review—relative to the Grizzly range, this is a feature rich option, with a releasable toe, brake, releasable heel, and microshift adjustment in the heel. I mounted the bindings to the ZAG Adret 85mm and skied them both skinning at the ski area, as well as in the Teton backcountry throughout the winter and especially spring.
Olympic II Design Highlights
For starters, race or “race plus” bindings have become my status quo over the past few years. I mostly ski on the Ski Trab Gara Titan on anything from an 85mm mountaineering ski to my 120mm powder skis. At 6’1”, 180lbs, I am not especially small, but these bindings have been totally reliable. All this to say, at 120g, the GR Olympic is in a similar weight class to my baseline–although it packs in an impressive feature set. Conveniently, the mount pattern matches the ATK Trofeo (30x27mm toe, 25x34mm heel), so a paper template or a shop with a jig wont be hard to come by. I measured the ramp angle at within 1mm of flat, with both heel and toe pins 27mm off the topsheet. This is the lowest stack of the bindings I have around, 3-4mm lower than Ski Trab and ATK race bindings, and 1cm+ lower than more conventional touring bindings.
Toe
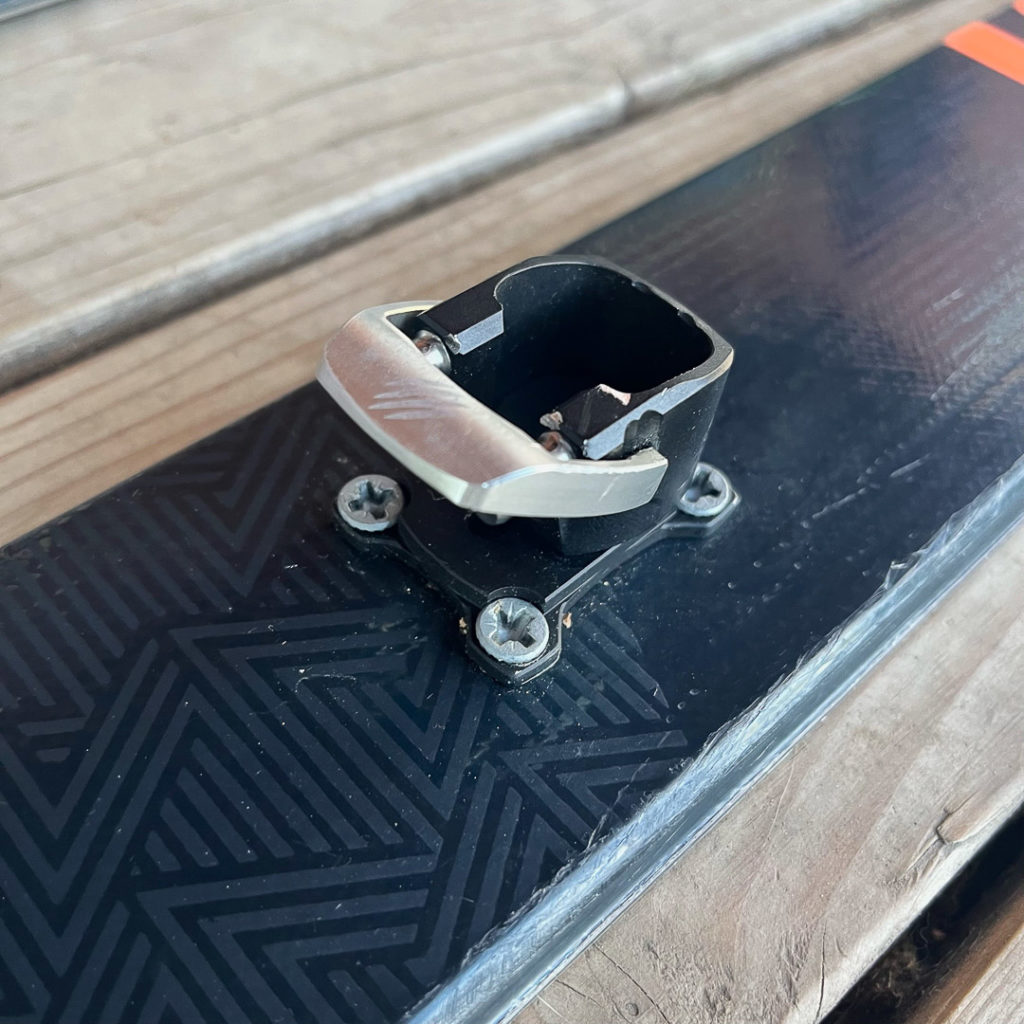
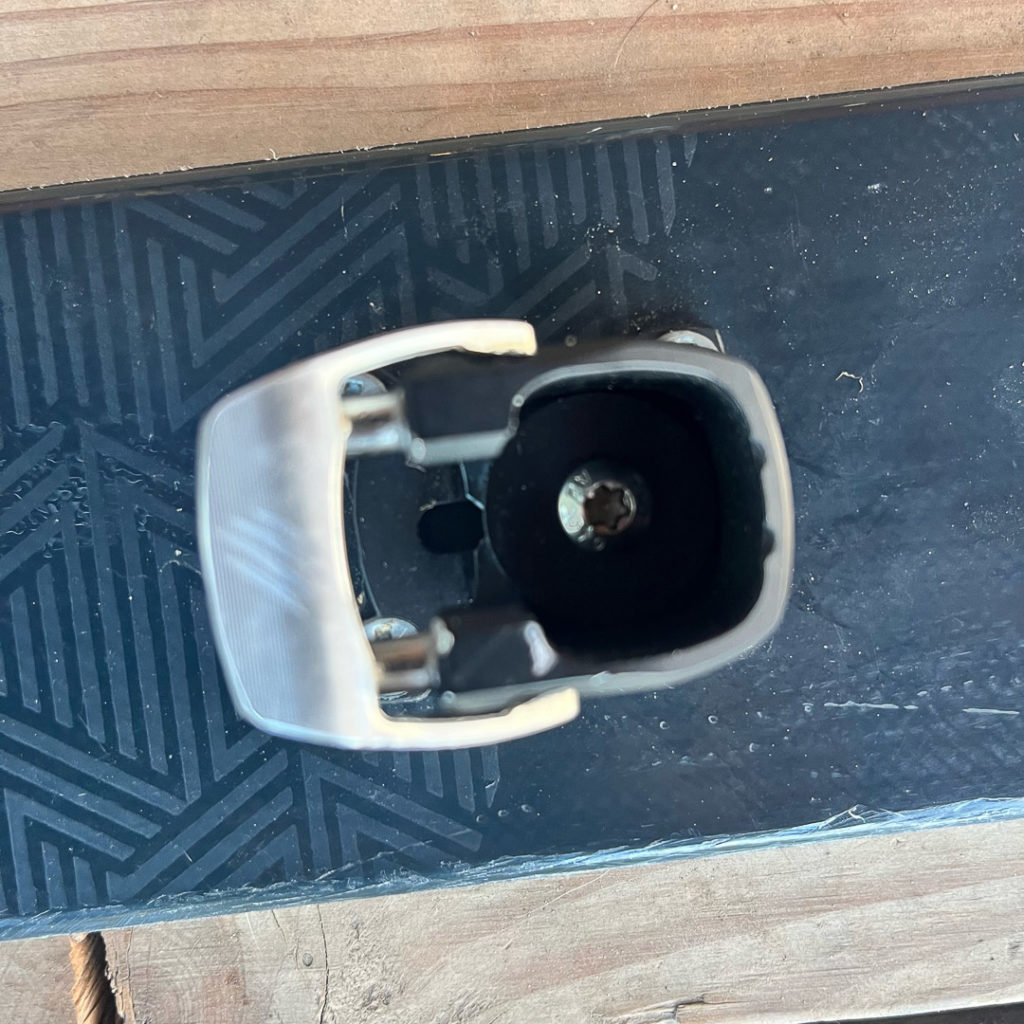
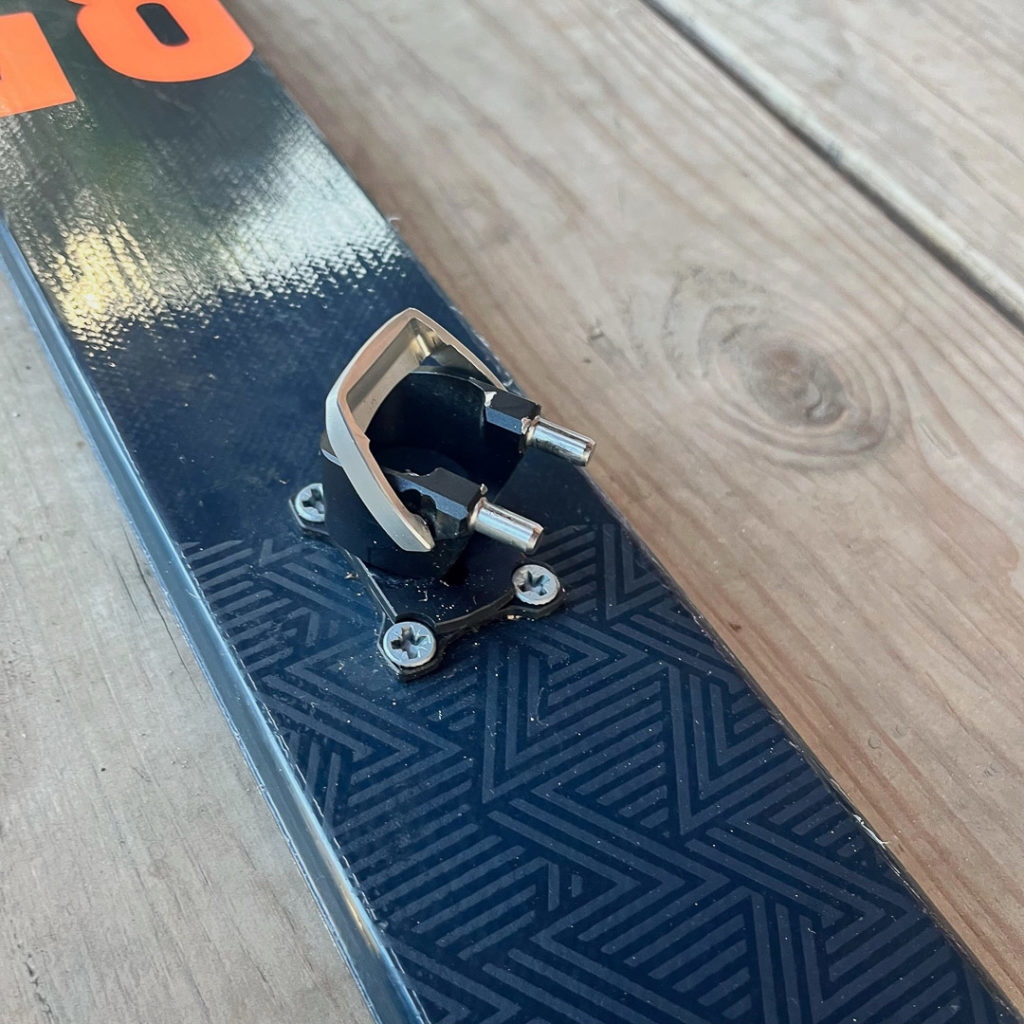
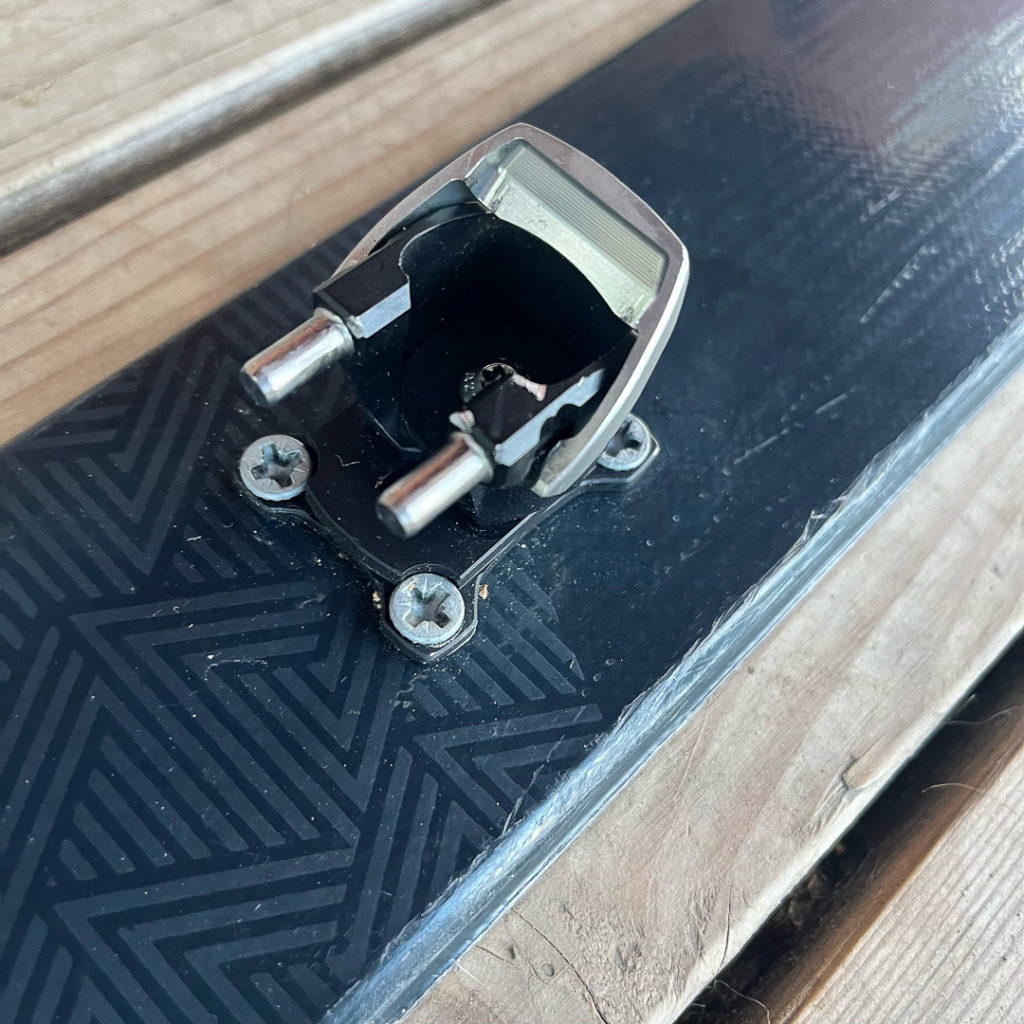
The Grizzly toe piece is the most obviously unique part of this binding. Rather than springs and pins controlled by a central lever mechanism, the Grizzly’s turn this norm on its head. The inside pin is effectively fixed, while the outside pin is hinged and locks into place using a small lever affixed to the pin arm. This is a big departure in the on/off process that definitely has a bit of a learning curve. The toe design is actually reminiscent of Voile Splitboard or Tele-tech toes, but with a significantly more robust, less plastic build. A real highlight of the simplicity of this toe design it leaves no room for ice and snow to accumulate and impede the function/retention of the toe – this can be somewhere between a headache and life-threatening with normal tech toes.
The toe has a lot of technologies to go over, all named GRIZZLY ____. Without delving too deep into the marketing terms, the toe features a brake (GRIZZLY BRAKE… you get the point) that is really simple and foolproof. The simple wire piece is held in channels by two t10 bolts, then out front there is a tiny lever that locks the brake up. I found it easiest to always step in to the binding with the brake locked up, then tap the locking lever to “arm” the brake for downhill skiing. The pins on the Olympic toe are connected by a floating bar (Safety Spring) of sorts that acts as a release spring. While touring with the brake locked up, the brake wire locks the floating bar in place—preventing flexing and subsequent release. The floating bar also features positioning nubs, a la Dynafit’s power towers, to ease step in difficulties. Last but not least, the toes feature a boot wear adjustment, in the form of another t10 bolt on the fixed toe pin. This allows one to adjust the pin spacing to retain strong retention with different boots and as boots wear. Anyone who has experienced an overly worn tech fitting that no longer works well with a classic tech toe will appreciate this feature (while they shop for new boots).
Various brake sizes are available for skis 65-95mm. 95mm is the max width Grizzly recommends, which seems normal from an official recommendation standpoint–I wouldn’t hesitate to put them on wider skis for soft snow, but because of the max brake size, I couldn’t go much wider than ~97mm. Because of the way the brake wire locks out the toe, removing the brakes isn’t an option. A removable ski crampon slot, compatible with Dynafit or ATK ski crampons. Can confirm my 90mm Dynafit crampons fit.
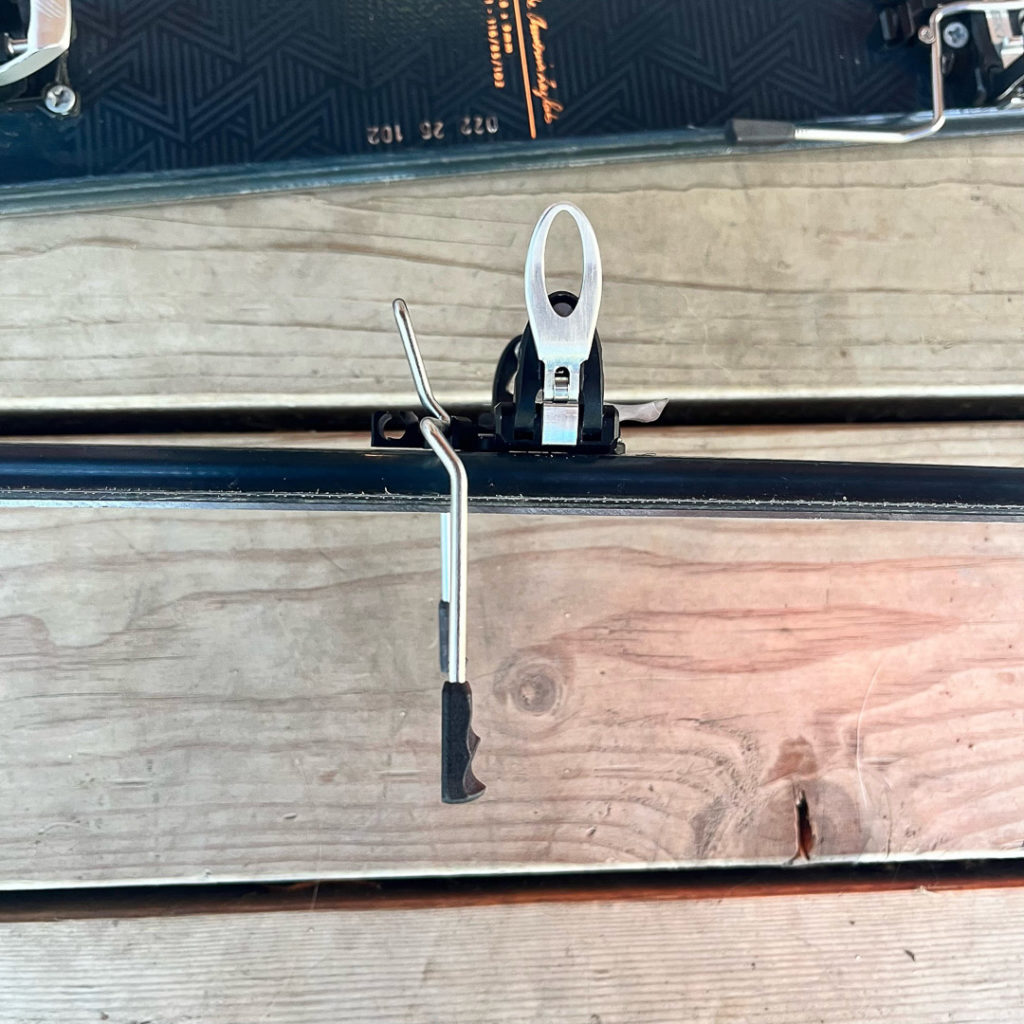
Heel
Unlike the toe, the Olympic heel piece is more aesthetically similar to other race heels on the market. Like the toe, it packs in quite a few unique and handy features. Like many race bindings, you choose a release value when purchasing—also, like many race bindings, there is no way to change this aside from buying a new heel piece. I’m generally of the opinion that adjustable release values add unnecessary weight, complexity, and failure points to tech bindings. Most users have the shop set the proper release value when they purchase the bindings, and never change it over the course of ownership—but they are lugging around significant extra weight and complexity for the entire life of the binding.
Perhaps the most interesting feature of the heel piece is the microshift adjustment plate. Hidden in the hollow middle cavity is a single t20 bolt. Flip the heel piece over, and the bolt threads into a tension plate style nut in a short adjustment track. Not only does this take the pressure off for getting the heel gap perfect on a fixed mount, but it allows one to use slightly different boot lengths (+/- 5mm from center) without remounting. A one-bolt tension plate certainly gave me pause relative to the normal 4 bolt style plates, but I didn’t have any issues with it moving or loosening.
The heel features a standard race flap style riser, with firm detents in both ski and walk positions. While the heel will rotate for lateral release, it is very difficult to rotate by hand–making a flat mode virtually impossible to implement.
The heel pins are made with hardened tool steel and show little to signs of wear after ~40 days out, they aren’t user replaceable but this doesn’t seem to be a concern. Grizzly also provides a lifetime warranty on the pins – so they aren’t concerned either.
Field Testing the Olympic II
First and foremost, I’m not that into brakes. Or leashes for that matter. I’ve always relied on being deliberate and careful getting into/out of my bindings as loss prevention (leashes in glaciated terrain are a different conversation). That being said, brakes are becoming a reality and necessity in many skiing arenas– namely resort uphill touring and ISMF races. After watching numerous kids jettison skis down the local resort during transitions (how many times will I have to say, “brakes down before you take your skins off”?). The Grizzly brake system is both the most effective (they might actually stop a runaway ski) and least obtrusive in day-to-day use, brake system that I have used. One caveat here—part of what makes them effective is that, aside from “alpine binding thick” wire, the brakes deploy to stick forward of vertical from the bottom of the ski—they really dig in. The downside here is that they are tricky to depress with your boot toe while stepping into the binding. My process is to hand-lock the brake up, step into the binding, then arm the brake by pressing the front latch. This leaves a vulnerable moment between locking the brake and stepping into the binding. Of course, ripping skins with your skis on alleviates this issue completely, but boot pack to ski transitions are an example of a spot where this vulnerability presents itself.
When armed, the toe is a bit more sensitive than most to releasing. I didn’t have any issues with pre-release, but skinning with the toes unlocked (i.e. brakes armed) is a bad option in all but the softest snow. I tested this one day by removing the brakes and quickly regretted my decision.
The step in/attachment to the toe piece requires a bit of a brain re-wiring. Especially for me as a Ski Trab devotee. Similar to a traditional toe, it is easiest to enter by lining up the inside pin with the tech fitting first, then, rather than pivoting your boot to snap the binding shut, one must reach down and pivot the second pin to snap into place in the outside tech fitting. Thankfully, I am (mostly) young and spry, so the necessary bend over and touch your toes isn’t usually an issue, but for less flexible/mobile folks, this could be a deal breaker. The flip side is, having watched people struggle profusely to get into traditional tech toes, this method feels more foolproof and harder to “miss.” Also worth noting—like the Ski Trab toe, I prefer the process of clipping myself into a tech toe, rather than stepping in, in steep or exposed spots. It feels significantly less likely to drop a ski with this attachment process. Getting out of the toe, one can either bend down again, or, preferably, poke or whack (maybe not recommended) the lever open and step out.
Like many race bindings, the lack of a flat mode is a bit of a pain in some contexts, high ROM boots make this better—but my toes still suffered a bit on longer flat skins. Also like many race bindings, there is only a single riser. This is a total non-issue with the high ROM boots most people will pair with these lightweight bindings and correspondingly skinny skis.

I adjusted the microshift plate a few times when switching between my Dynafit DNAs and Technica Zero G Peaks, a long t20 bit made things pretty easy and I was able to tighten the screw a bit more aggressively than I normally do with a 4-screw plate. No issues here, and its super cool to have this adjustability with the svelte looks of a fixed mount race binding.
Parting Thoughts
A common comment on any new binding company or model is to wait for Gen 2 as Gen 1 bindings tend to get their final phase of mass testing with the early adopting customers. Contrast this with Grizzly, who spent 19 years (!) prototyping, testing, tinkering, before coming to market with their first models. The Olympic works exactly as advertised and feels robust and reliable. That being said, I’m not sure the Grizzly toe system is for everyone. It feels a bit fiddly to get into at times, and could be a real issue for less flexible users. For more devoted brake users, whether that is for runaway ski prevention, race requirements, or resort based skinning, the Grizzly brake system is the least intrusive brakes I’ve used, especially in the context of race style transitions. For folks that are nervous to commit to a fixed mount race heel, the Grizzly shift is a svelte way to ease those nerves and reduce the commitment to a single pair of boots.
Grizzly.Ski GR Olympic II Specs
Weight: 120g
Materials: Aircraft grade Aluminum and stainless steel
Release Value: Fixed at 6, 8, or 10 (Lateral release in the heel)
Heel Risers: Race Flap only (No flat mode)
Length Adjustment Range: 10mm (+/-5mm from “center”)
Brakes (Required): 65-75mm, 75-85mm, 85-95mm
Crampon Compatibility: Available separately (+6g)
Made in Slovakia
MSRP: $599.00 USD
Leave a Reply
You must be logged in to post a comment.