
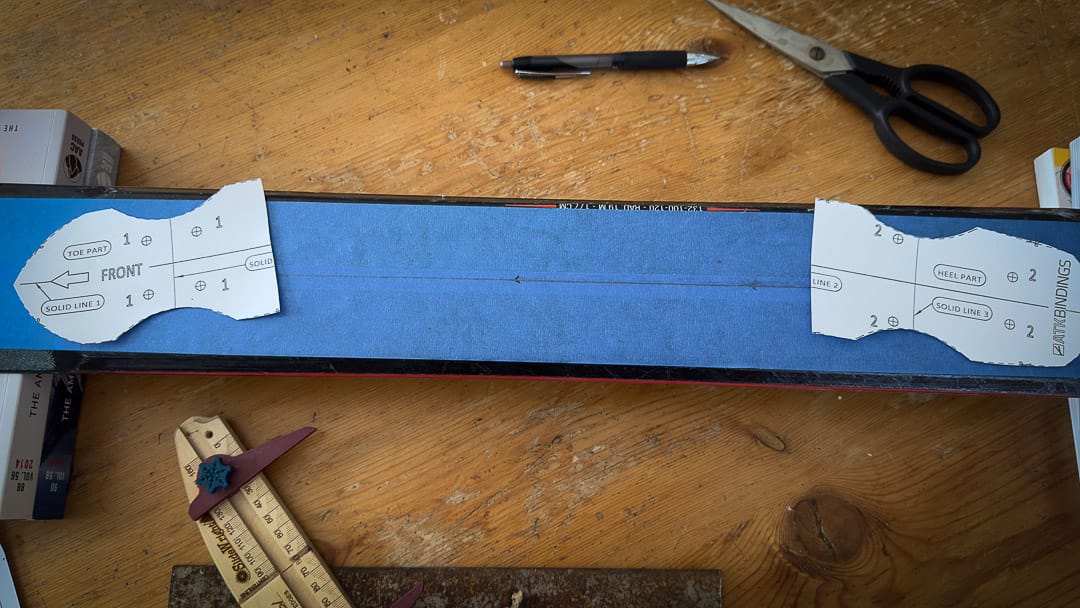
So you want to use a paper jig to mount your tech bindings…?
During a quite good conversation last weekend, the topic pivoted to self-mounting tech bindings… with a paper jig. Many longtime Internet denizens know a time when Dynafit jigs were scarce, or when we were collectively either DIY-focused or just short of the cash, and self-mounted bindings with a paper jig from Lou Dawson or deep in some online forum. I’ll wager it’s safe to say most of us who have done the deed have misfired on something in the multi-step process of using a paper jig. Some might say paper-jig mounting is a rite of passage. Some may say pony up the $ and pay a well-respected shop with a proper jig. With a nod to Fleetwood Mac: “Go your own way.”
We could, however, run through the myriad ways one could screw up a paper-jig guided mount. Here are but a few: You print the paper template at the wrong scale; the paper template and center line (drawn on the topsheet) do not perfectly align… make sure the centerline is, in fact, right down the center. Maybe you didn’t use a binding-mount-specific drill bit with a stop, so you drilled through the ski. I have seen with my own eyes two skis with eight holes per ski straight through from topsheet to base—as in through the base. The backstory is this: A great friend was mounting his partner’s skis for her birthday (some iteration of BD Helio Carbon), and he made the mistake. The relationship survived, and I’d say it is still thriving.
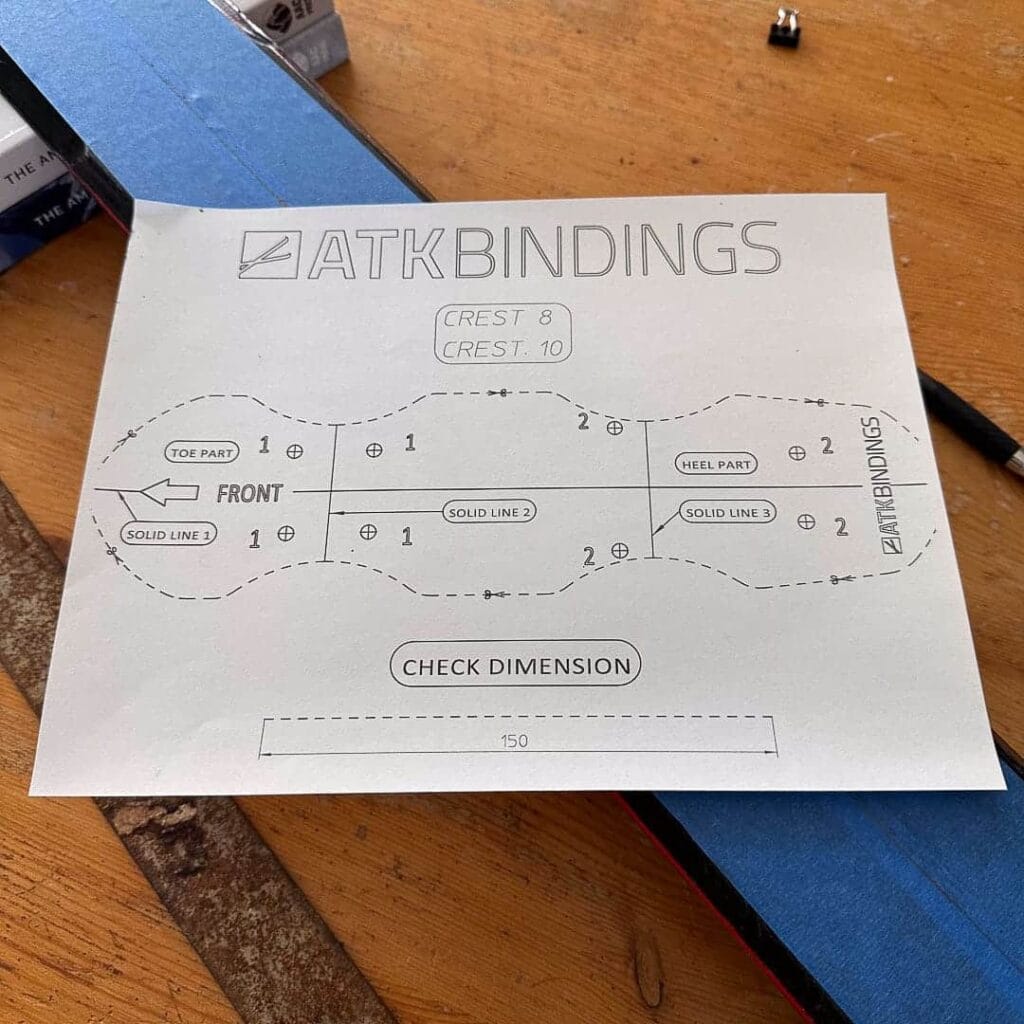
Again, the paper-jig mount job is part meditation, and part committing to a steep line—you might get puckered, but it’s the good kind of fear that prepares you for life’s more stressful moments, like explaining to a partner that their new skis are a bit lighter with eight holes aerating the core.
So, back to the conversation last weekend. This person I was speaking with had read an article I wrote in the past—not on The High Route—about self-mounting skis. I cringed. Not because I don’t stand by that post about paper jigs, etc., but because I’d feel some responsibility for any potential screw-up. Irrational? Maybe. But, I’m human. I recall saying something like, “You didn’t use a paper jig, did you?”
His response was the one I sought. It went something like, “No. It seemed like a reasonable endeavor, but paper and tape and drilling through new skis seemed like more stress than I wanted to take on over the weekend.” He brought the skis and bindings to Alpenglow Sports in Tahoe City for the mount. However, the conversation got me thinking, and then asking, “What’s the most critical part of the paper-jig binding mount?” Besides some of the steps listed above, I’d assert, and feel free to disagree, that it is marking the centerline. If you can ensure the centerline is, in fact, centered, the rest should be pretty straightforward.
This was also the same weekend that my friend, Dakota Blackhorse-von Jess, showed me a basic tool to help him draw a centerline. FYI, Dakota (or Dak as we call him), is a dedicated DIYer; he can rebuild a car engine.
Dakota took a moment and built his own centering-finding jig. In Dak’s words, “Lots of designs out there, but all basically variations on a theme—as long as the scribe (pencil, usually) is centered between two fixed points (bearings, dowels, whatever) then regardless of the width of the thing you’ll always be able to find center.” See below for Dak’s pretty simple, but functional DIY center-finding jig. The process is simple. As long as the nuts are up against the ski’s edge, you can mark the ski’s center. Make several marks using the tool that runs through the binding mount zone, then draw a line with a precise straight edge connecting those dots, and you should have an accurate centerline.
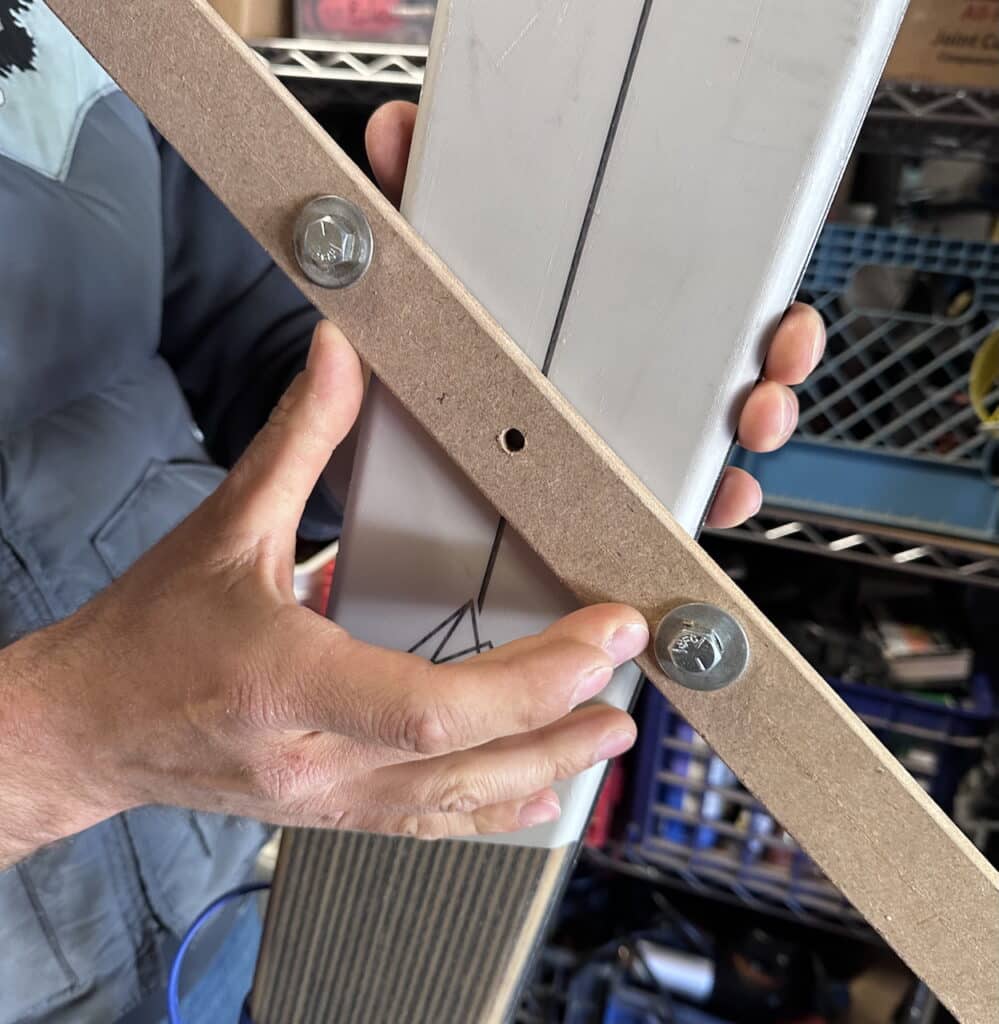
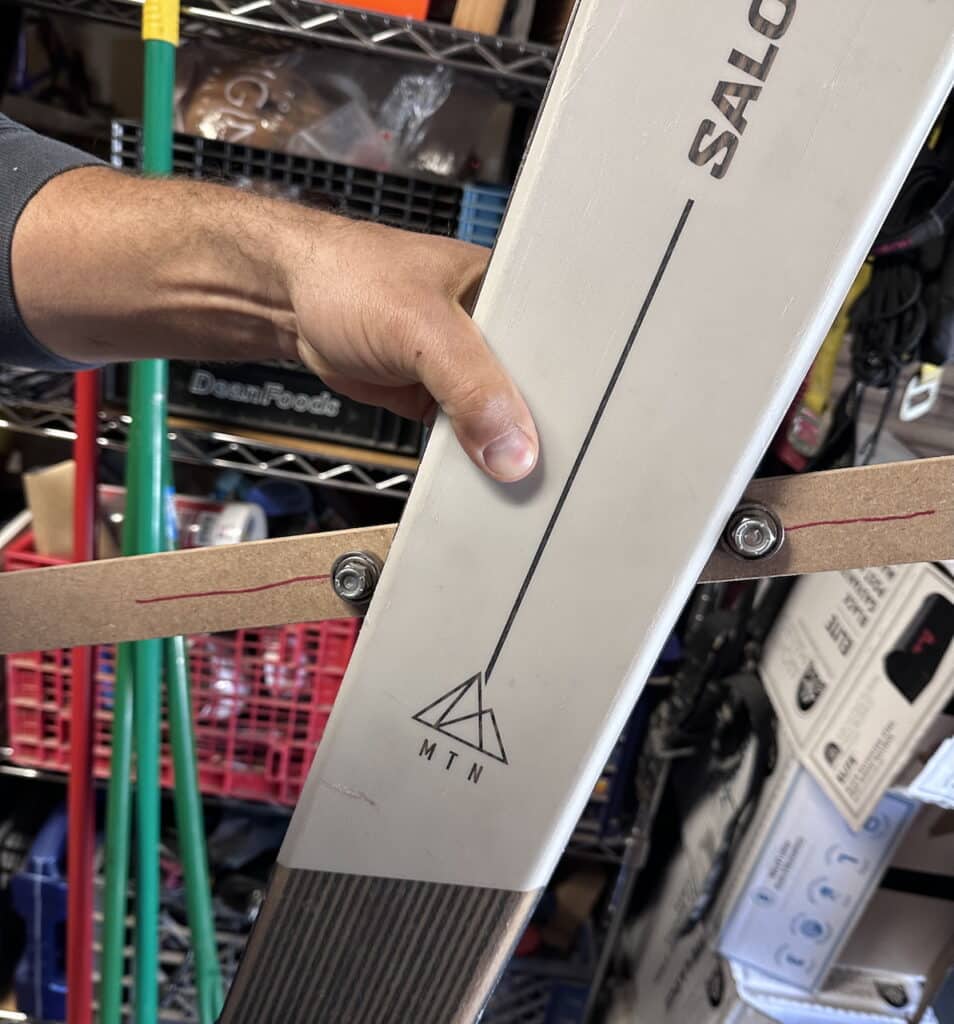
Dak’s tool is cheaper than some items out there. But if you are daunted by making your own center-finding jig, you have some options. (We have experience with the Slidewright tool, not the Bullseye tool, although it does look nice.)
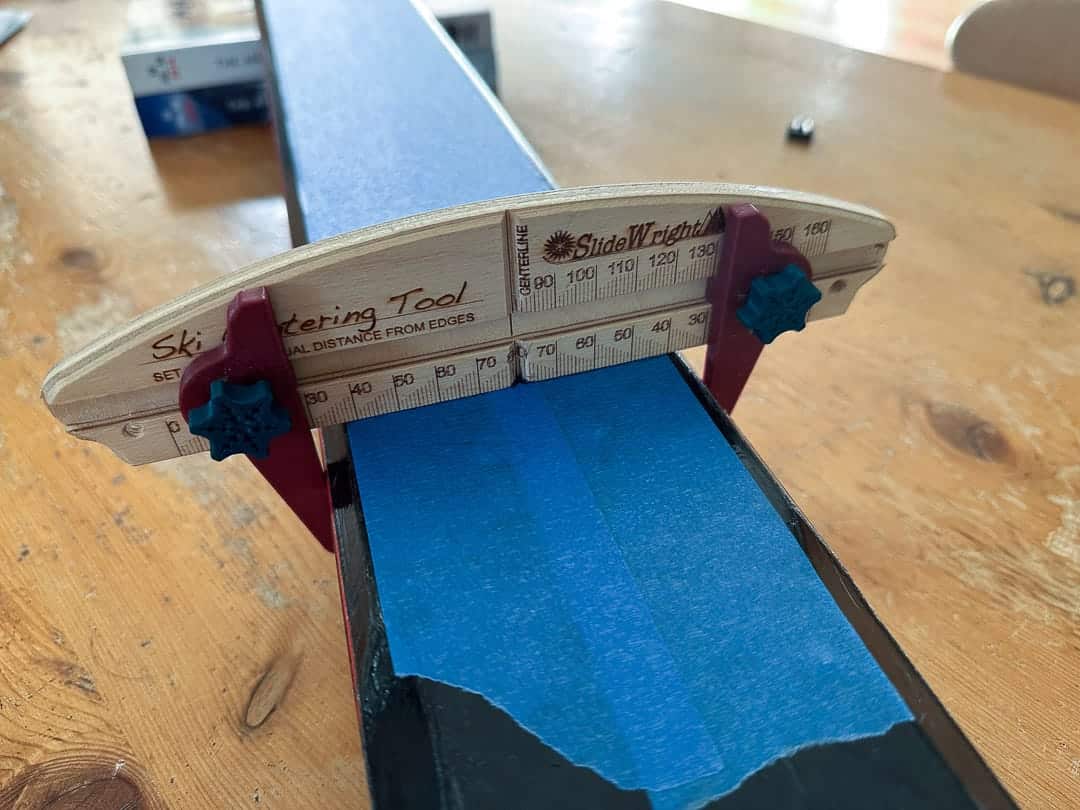
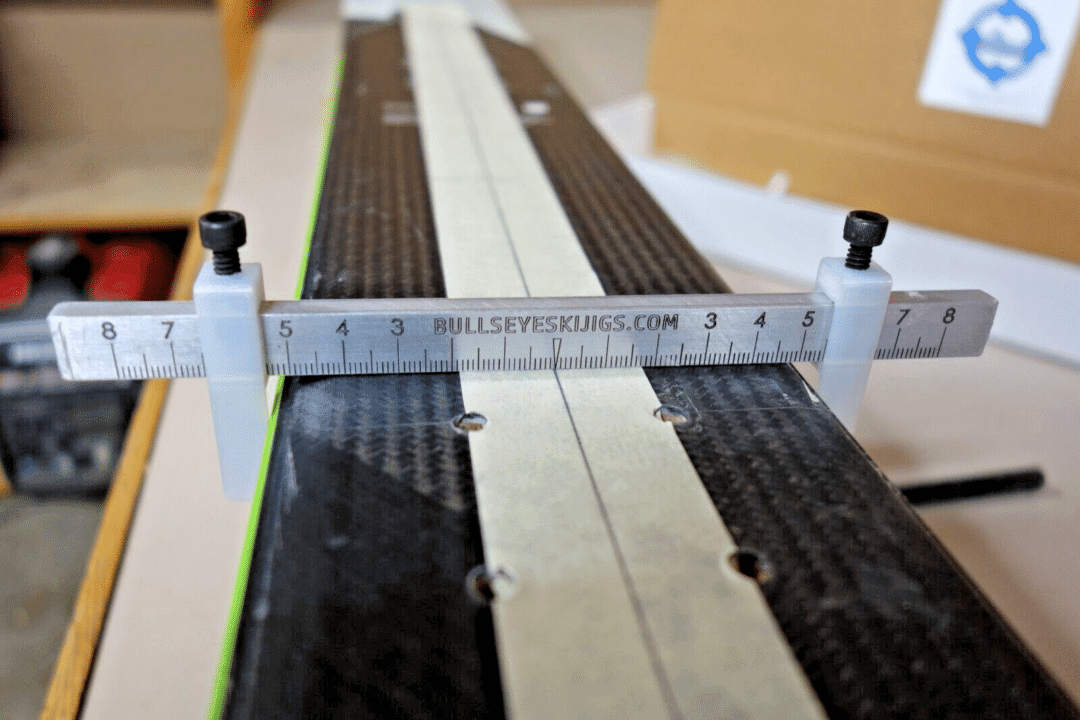
There are other methods to find a ski’s centerline, though we are trying to keep it simple: a center-finding jig is extremely helpful and won’t break the bank.
You could also support your local shop and have those folks do the deed—mount up a pair of tech bindings—with a proper jig.
If you must go the paper jig route, here are some key items:
- Practice the mounting process 2-3 times on a 2″ x 4″ if you are a DIY binding-mount neophyte. If it’s been a while, it’s not quite like riding a bike. Practice at least once.
- Measure at least twice and drill once.
- Print two complete binding templates. Cut each respective template in half to separate the toe and heel templates. (This leaves you with 2 x heels and 2 x toes.)
- Ensure the scale is 1:1 on the printed binding template. Often, paper templates include a scale bar; use a ruler to measure against it and verify the scale is correct.
- Place the binding toe and heel units on the printed template and line screw holes up to confirm the proper scale. And, we suppose, to confirm it’s the correct template in general.




Leave a Reply
You must be logged in to post a comment.