Marker Alpinist: The binding that offers everything you need, and only a dash of what you don’t. After three seasons on these bindings, I almost love them. They’re lightweight, have three riser heights (including flat), and have never iced up on me. So far, so good.
Where do they fall short, you ask?
It’s those heel risers. After a couple of seasons of weekend-warrioring (with the occasional “sick” day in the mix), the heel risers have loosened, so they flip out of position, leaving me unexpectedly and unpredictably in flat mode. This inconvenience, however, has never been a tour-ending problem for me, but it’s getting worse the longer I neglect to fix it.
Instead of repairing them, I developed a technique to flip the risers back in place. It involves kicking my feet forward with a little more vigor than normal. This stride is not exactly efficient, and it kind of looks like I’m trying to scrape dog doo off my skins every time I take a step.
I refuse to enter this upcoming season on busted gear. It’s time to diagnose and fix the problem.
Diagnosis
From what I can tell, the root cause is some uncharacteristically questionable German engineering: a steel detent spring (a short length of wire) holds the aluminum risers in position. (The spring tension pressing against the riser provides enough friction to prevent it from flipping out of place.) That is until the hard steel wears a groove into the soft aluminum. That groove reduces the pressure exerted by the spring. Less pressure means less friction. Less friction means a loose riser, resulting in a frustrating trip up the skin track.
This breakdown is the predictable result when a design impinges a hard metal against a soft metal. As my 11th-grade English teacher once said, “Marker, I expect so much more.”
Repair or Replace?
Your first thought is probably that this should be covered under Marker’s three-year binding warranty. Agreed. However, I bought mine second-hand (albeit new in the box), so that won’t work for me. But if you can get Marker to warranty your bindings, do it.
Your second thought may be to replace the risers. By all appearances, Marker never intended for the riser to be a replaceable component. They are attached to the heel mast with press-fit pins, which are beyond most home ski tech’s ability to remove and replace. Furthermore, Marker doesn’t sell the risers alone. You can buy the entire heel piece for $120, but that’s a hard price tag to swallow just to fix a couple of millimeters of worn aluminum.
I found a small indie manufacturer who makes an aftermarket replacement riser with a slightly different design – they would claim significantly improved. However, as of this writing, they’re out of stock, and it’s unclear if they’ll do another production run.
So where does that leave us?
We will patch that groove in our risers with J-B Weld epoxy, a high-strength “cold weld” compound designed for heavy-duty metal repairs. It’s not the ideal fix, but it should do the job.
Full disclosure: Being an East Coast skier in the middle of a mild October, I have yet to try this repair out on snow. However, skinning around my living room has yielded promising initial results.
Supplies
- One package of J-B Weld Twin Tube 2 OZ original cold weld formula
- One disposable mixing surface (a paper birthday cake plate pilfered from your mother-in-law’s stash of party supplies works great)
- Two+ Fine-pointed applicators (M-I-L’s American Flag toothpicks highly recommended)
- Needle Files (I had to buy these. Strangely, there were none among the party supplies)
- Several Paper towels
- Degreaser (if you really want to go all out on this repair)
- Masking tape (optional, but recommended)

Directions
Locate the Groove
This critical first step is slightly trickier than it sounds. Let’s use my bindings as an example.
My risers only flop in high mode (because that’s what I tour in most often). This means that the groove has worn into the underside of the riser when in high position. To access this groove, I have to put my riser in mid position (covering the heel pins). Keep this in mind so you don’t accidentally “repair” a surface that doesn’t need it.
Clean the Groove
Clean the area of your heel risers in and around the groove with a paper towel. I didn’t use any degreaser here, but if there are any strange residues on your binding, it might be a good idea. I just used water.
Rough up the Groove
Using the skinny tip of a needle file, scuff up the groove. We’re not looking to remove much material here. We want to give the smooth groove a little texture so that the epoxy has something to hold on to. In my cheap six-pack of files, the one with the thinnest circular cross-section worked best for me.

Clean the Groove (Again)
With a wet paper towel, wipe away any aluminum filings. We want the surface to be perfectly clean to ensure the best possible bond.
Tape (Optional)
They call it J-B Weld for a reason. This stuff is strong. You want to avoid accidentally epoxying your heel riser in position. To prevent getting JB-Weld on any surfaces I don’t intend to bond together, I covered most of my heel piece with masking tape, leaving just the groove exposed.
That said, JB weld is pretty clean. It’s highly viscous, so it won’t drip or run excessively after you apply it. With careful, steady hands, you’re not likely to, say, weld your riser to your heel pins. So, if you’re feeling confident, lucky, or both, you can skip the tape.
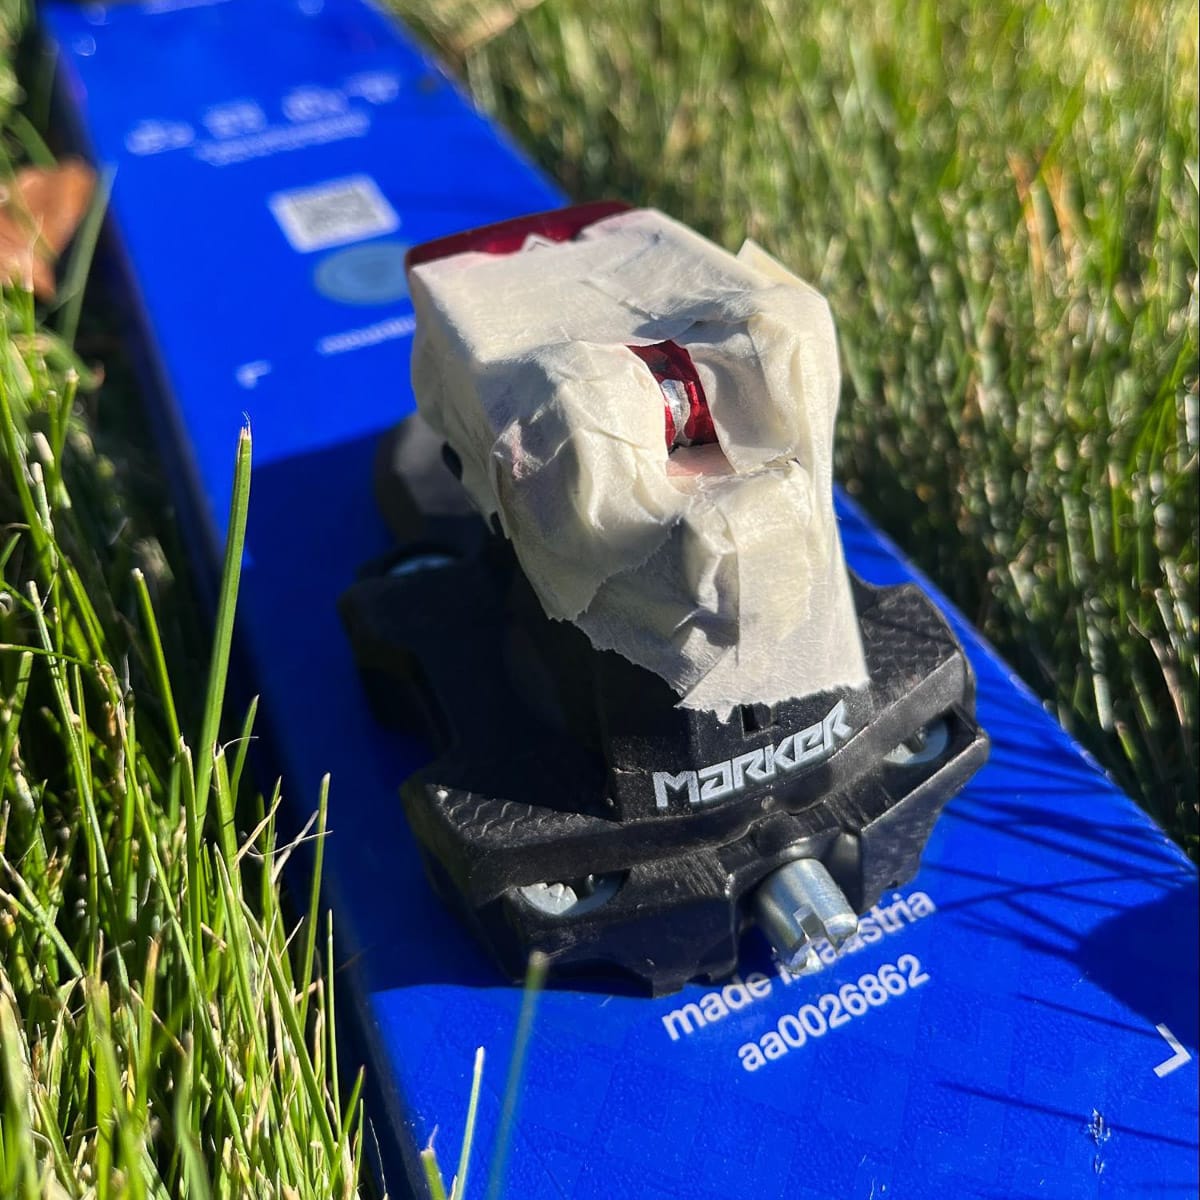
Mix
Squeeze a short bead of epoxy (black tube, comes out black) onto your paper birthday party plate or whatever other disposable surface you can get your hands on. Next to it, squeeze an equal-length bead of hardener (red tube, comes out white). Mix with a toothpick. When thoroughly mixed, the compound will be gray.
Be stingy. We’re filling a tiny groove here; you need very little compound for this repair.
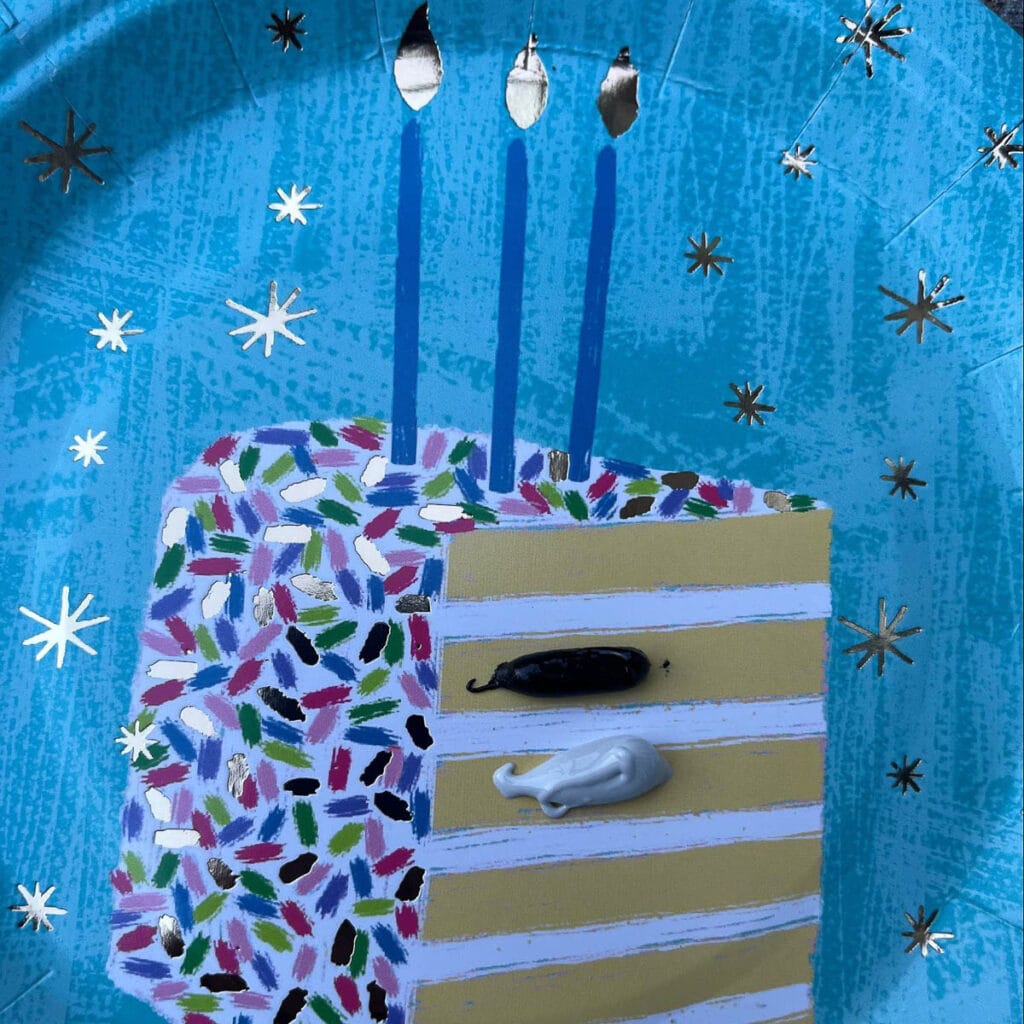
Apply
Using a patriotic applicator, fill the groove with the J-B Weld. Try to keep it as clean and smooth as possible, but don’t stress too much. We’ll file down any excess once the compound cures.
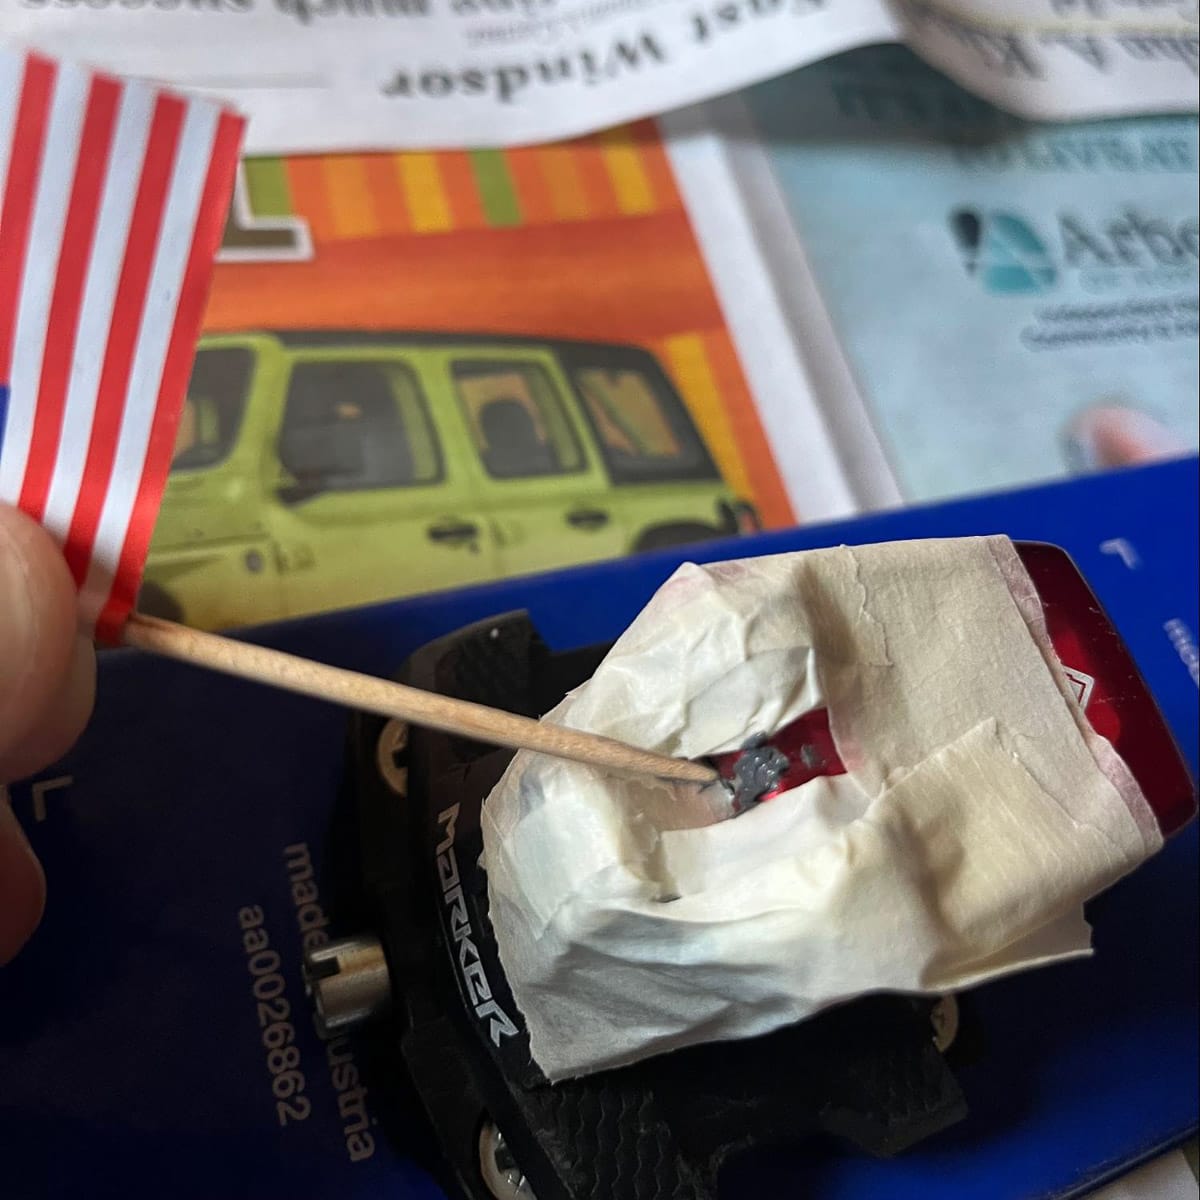
Cure
J-B Weld original cold weld takes about a day to cure fully. So set it aside and do something other than ski for 24 hours. Go for a bike ride—a run. Treat yourself to a little birthday cake if you have any leftovers, but please use a clean plate.
Once cured, the epoxy should look something like this:
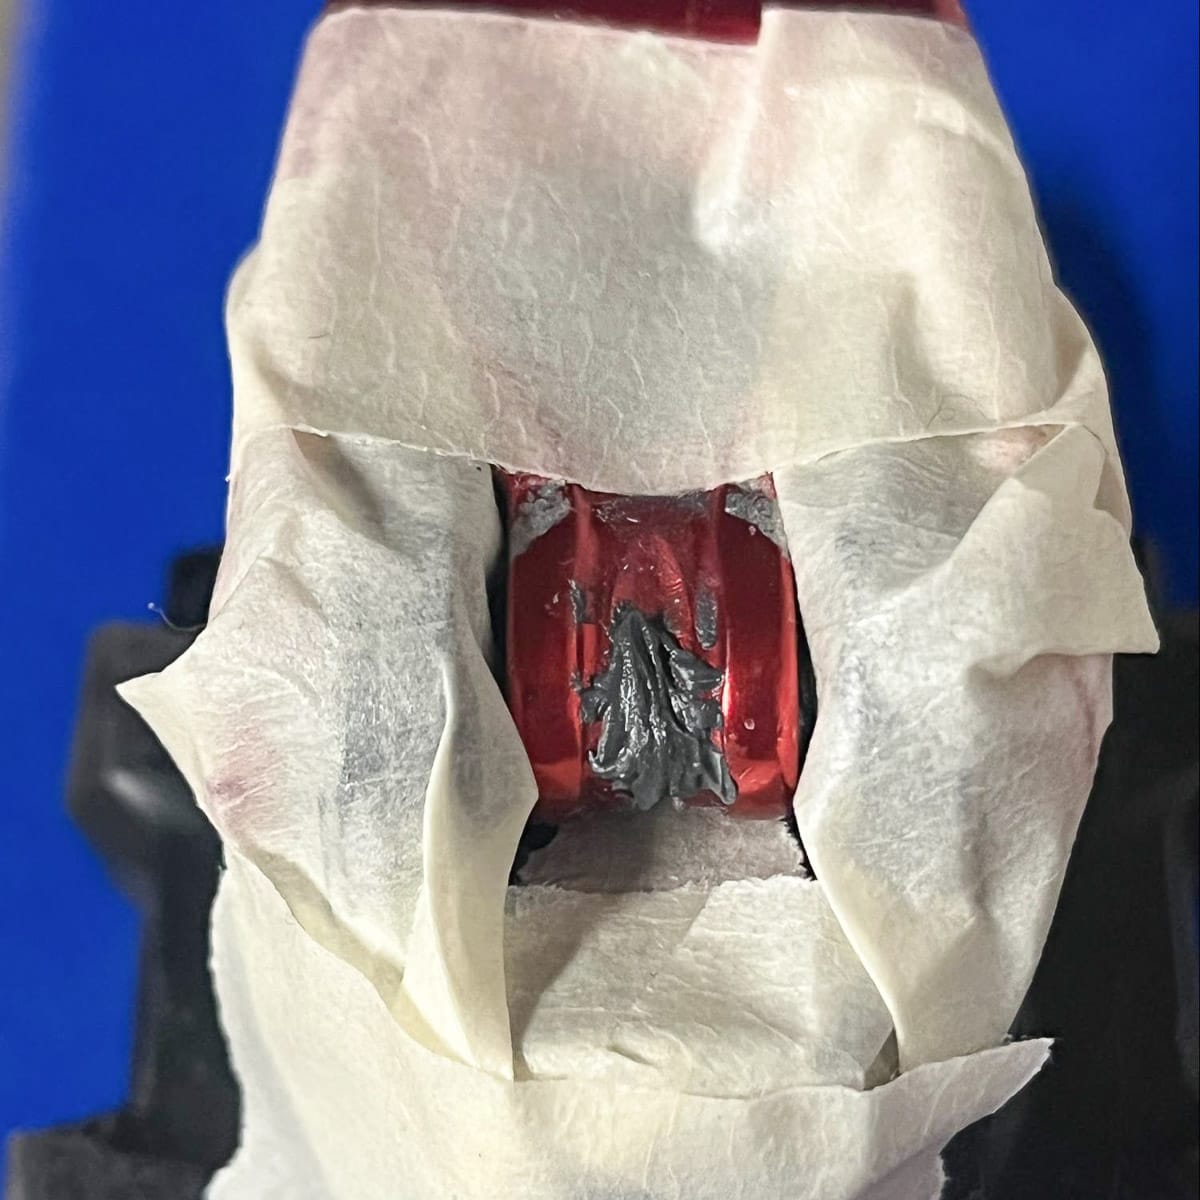
File
Clean up the patch with the files, smoothing out any rough edges. Take a little material off at a time, then try to flip the riser into position to test the tension in the detent spring. Don’t force it; if your patch is as thick as mine, you’ll have to remove quite a bit of material before the riser flips all the way over. Once you’re satisfied that the riser flips smoothly and will stay in place, you’re done.
If Michelangelo were a skier, I’m sure he could sculpt the epoxy to be a perfect likeness of the original aluminum form. However, our goal with this quick and dirty fix is simply to add sufficient material to our risers so that they make good contact with the detent spring. If we’ve achieved that, we don’t much care what it looks like.
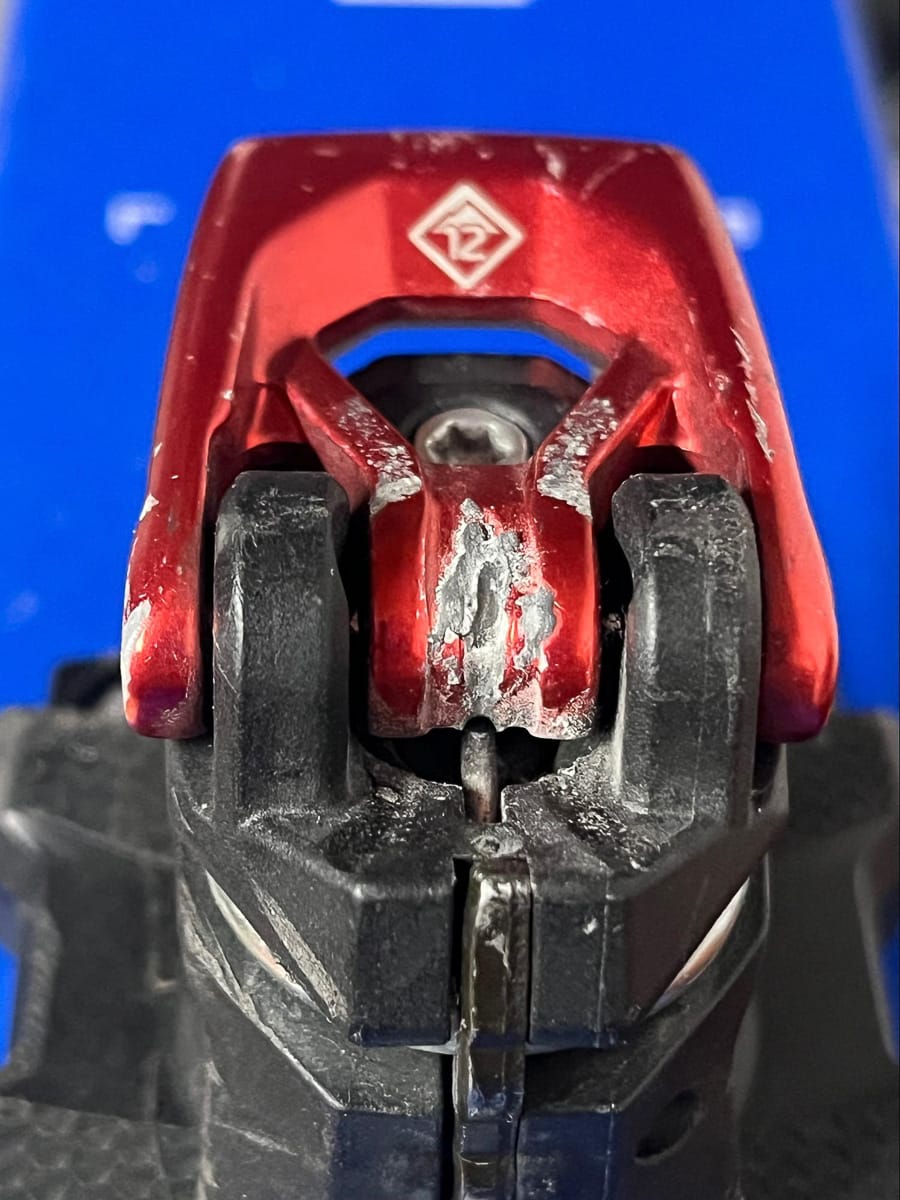
*Note that the spring will press a bit of a groove into the epoxy, even once cured. Does this portend a short lifespan for this fix? We’ll see. I will report back once I can test the repair on snow and again for a long-term update. If you try it, I wish you the best of luck. And if you know of other fixes for loose Alpinist heel risers, share them here in the comments.



Leave a Reply
You must be logged in to post a comment.