Adam Fabrikant rappelling in the Tetons. Photo: Billy Haas

Adam Fabrikant rappelling in the Tetons. Photo: Billy Haas

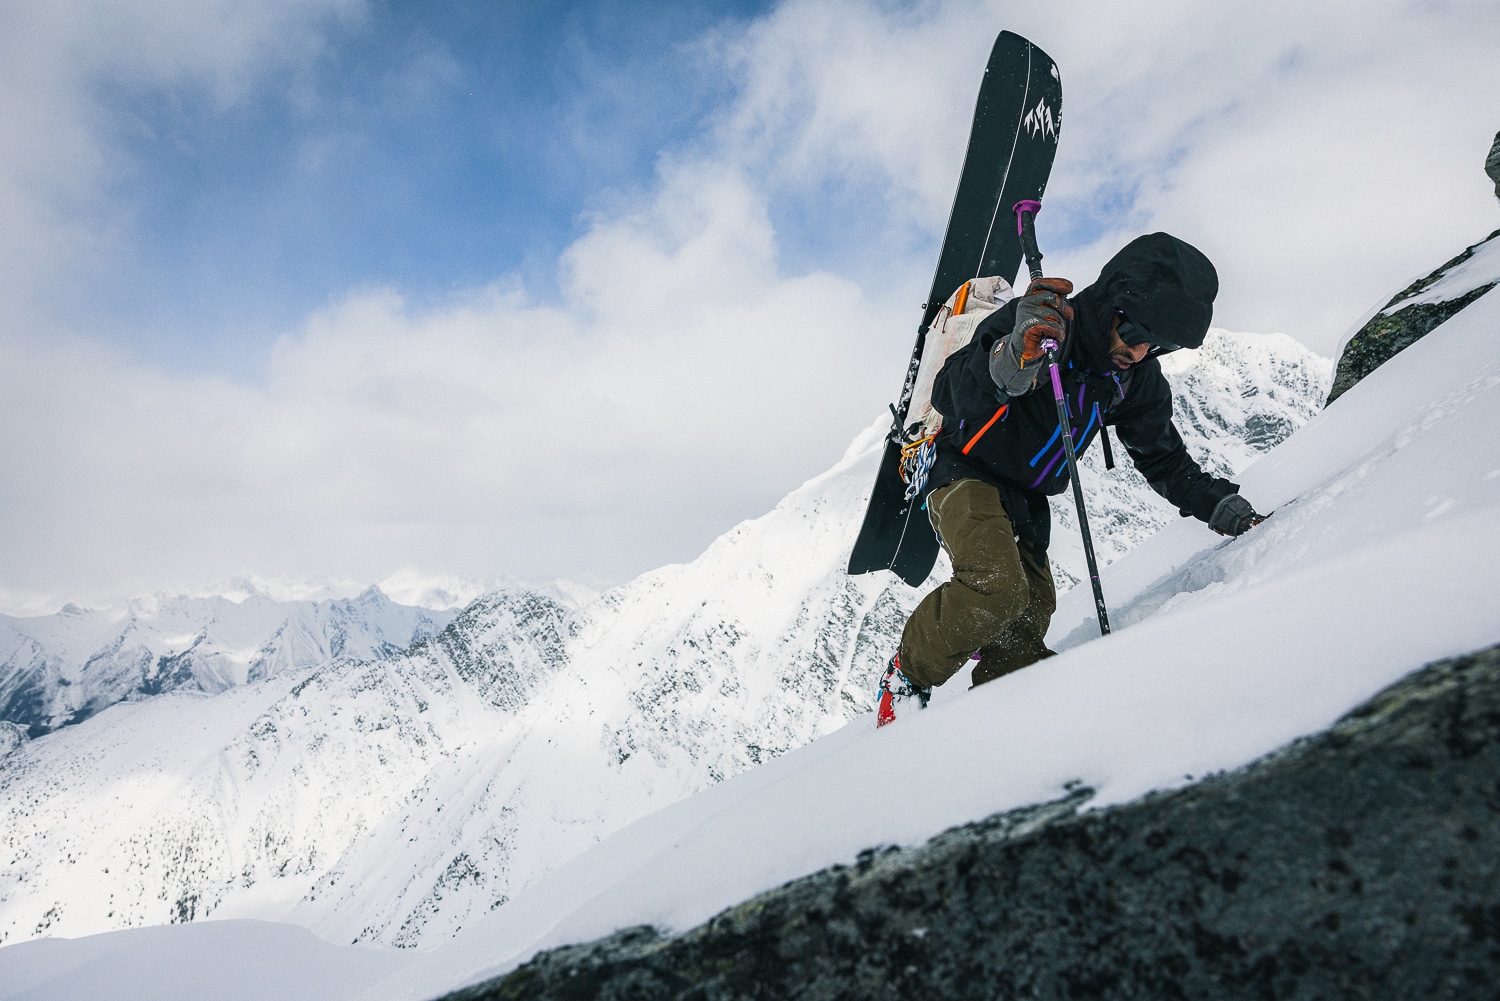
Sometimes, part of the ski decent requires a rappel here and there. Sam Hennessey has some rappelling pointers for aspiring ski mountaineers.


With the confidence of a priest proclaiming the word of god, a prominent member of the AMGA once told me that ski mountaineering starts when you have to use a rope. I’d argue that using the rope to descend seriously detracts from any ski descent, mountaineering or not. Still, there’s no denying that being handy with the cord can be a pretty useful skill in the mountains: It can get you out of a jam and open up options for lines that simply won’t go without it. Rather than being some hallmark of a “mountaineer,” I’d argue that being a competent rope rider is another skill to learn—a tool you’d rather not use but are sure glad to have when you need it. As skiers specifically, some different considerations regarding rappelling are worth discussing.

First, what equipment do you need? A rope is obviously the first place to start, and there are dozens of different options these days, from beefy single-rated cables to skinny, high-tech shoelaces. For skiing, weight tends to be a big deal. After all, isn’t having fun on the way down the whole point? 

For that reason, I tend to lean towards the lighter side—and shorter as well, assuming you don’t have to rappel that far. 30m of rope feels a lot better in the backpack than 60m, regardless of the diameter. One consideration when using skinny ropes is the size of your rappel device – standard devices often don’t work particularly well with the slick, skinny cords, especially on steep rappels. My solution is to use a Petzl Reverso (rated to 7.3 mm but seemingly fine down to 6mm) and add friction when needed by clipping an extra carabiner through. 

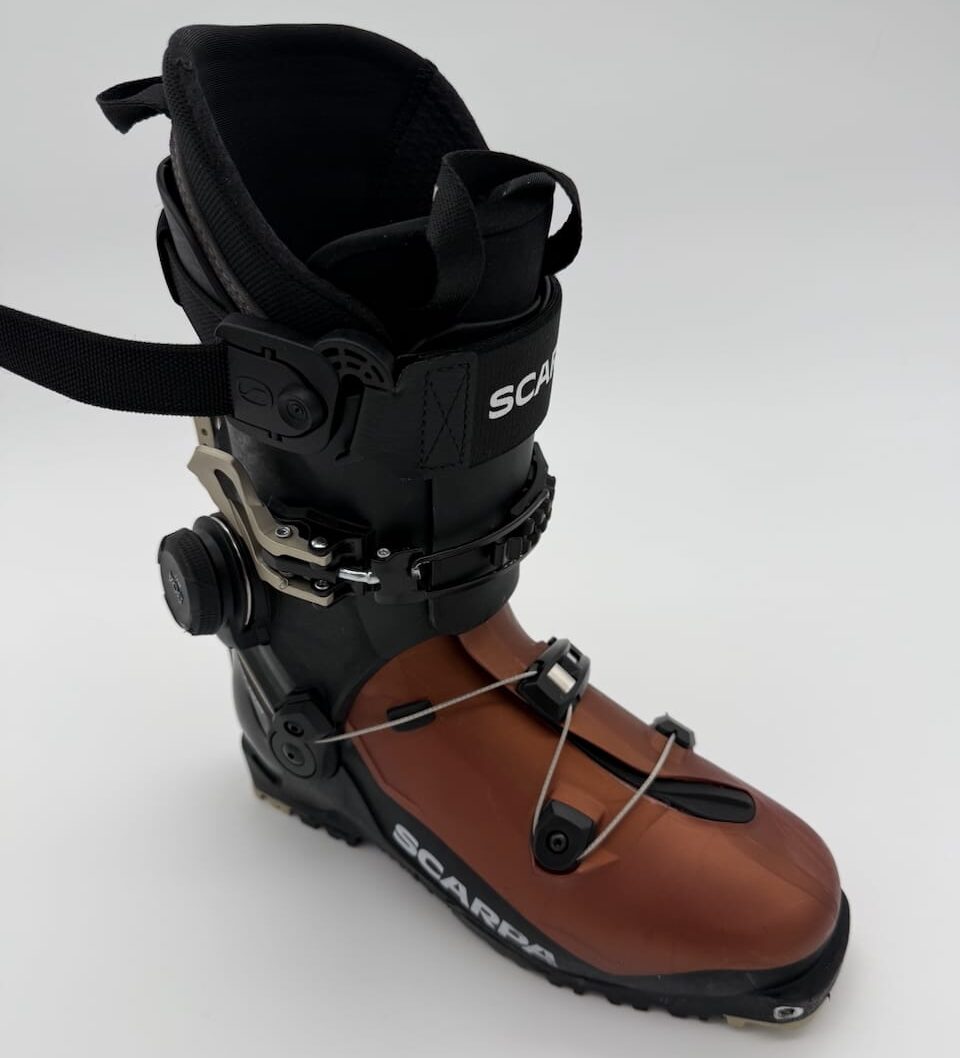
To round out the kit, you’ll want a harness (minimalist, with the ability to put it on with your skis on the ground, which is crucial), a 120 cm sling, and a couple of lightweight locking carabiners.

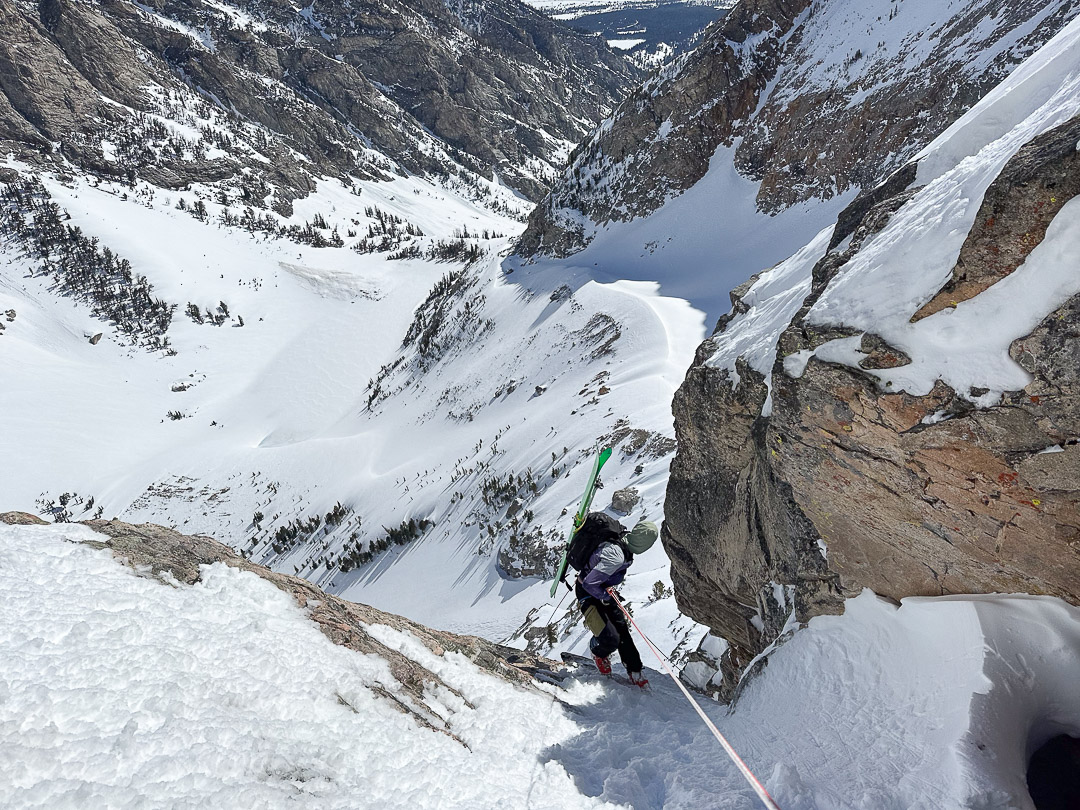
Imagine the typical rappel scenario: You link turns down a steep face and cautiously approach a cliff. You spy the anchor to your right and traverse over. Is this an ideal place to put on your harness, dig around in your backpack, and look for your gear? Probably not. One of the best lessons you can learn about traveling in complex terrain is to think two steps ahead at all times. At a minimum, when descending into technical or unknown terrain, I like to have my harness on and have a sling girth hitched to the belay loop, ready to go as a tether. 


Arriving at the Anchor

Upon reaching the anchor, I can clip in, inspect it to make sure it is solid (important!), and deal with the rest of the rappel system while securely attached to the mountain. Once you are secure, there are a few things you need to sort out. First, do you need to take off your skis? Often, on short cliffs or sections of unskiable snow, you can leave your skis on your feet and slide through facing backward. For more sustained steep terrain or multiple rappels in a row, you should remove your skis (carefully) and attach them to your pack. If rappelling over sustained icy terrain, I typically put on crampons.

Now you are clipped in and have your ski situation sorted out; it’s time to deal with everyone’s favorite piece of equipment…the rope. Most often, I carry the rope inside my pack rather than on the outside or coiled around my body because it’s nicer to ski down that way. Stowing the rope means you must remove your pack (which you might have had to do anyway to put your skis on your back). Being careful not to drop it, feed the rope through the anchor until you reach the halfway point—which you should clearly mark ahead of time. 


Knots and the Rope Toss

Additionally, a simple thing you can do to prevent a catastrophic accident is to tie some knots in the ends of the ropes, so take care of that now. The next step is to throw the ropes. Coil half in one hand and half in the other, then toss the half closest to the middle, followed by the ends, to ensure a nice toss with minimal tangles.


On rappel—an instance where the skier has transitioned to skis-on-pack for a lengthy rappel. Photo: Billy Haas

On rappel—an instance where the skier has transitioned to skis-on-pack for a lengthy rappel. Photo: Billy Haas


The Rappelling

Next, you need to attach your rappel device to the rope. Run both strands through the device, brake side down, and don’t forget to lock your carabiner. For very steep rappels, rappels into unknown terrain, or for descending in “active” conditions (sluffing, rockfall, icefall, etc), I will also add a friction hitch backup. Once you are attached to the ropes, it’s time to slide on down. The first person has the hardest job and often needs to sort out tangles, snagged ropes, etc., especially when using a skinny rope. Once they are down, the next people can follow, and the first person can contribute by either finding/building the next anchor, threading the ropes, or sorting their ski kit out so they can be ready to pull the ropes once everyone has descended.


More info on skinny ropes from The High Route

The Skinny Rope Q & A: Rappelling with a Super Münter on Skinny Lines

The Gear Shed Podcast: The Skinny on Ski Mountaineering Ropes


Pulling Ropes

Pulling ropes has a bit of nuance that can often be overlooked. First, maintain control of both strands of rope until the last possible second— there is nothing worse than a wind gust sending your ropes flying out of reach, leaving you stranded. Untie any knots in the ends unless you enjoy climbing in your ski boots and feeling like an idiot. Generally, I pull the ropes as fast as I can until the end is nearly through the upper anchor, then slow down and give a strong outwards tug just as the end passes through. Hopefully, this sends your rope sailing down without any tangles and snags.

If your rope gets stuck, your first instinct will be to yank down on it as hard as possible: resist the temptation! Not only will it potentially wedge the obstruction even tighter, but it can send loose rocks tumbling down in your direction as well, with potentially fatal results. Instead, try to change your direction of pull, flip the rope up and around to remove it from potential obstacles, and pull gently. Most of the time, this will sort out the issue. If it is properly stuck, you’ll have to go up and retrieve it… good luck.

Once the ropes are down, you’re home free. Get your skis back on, coil and stow the rope, and look around. If there’s nothing but snow below me, I’ll remove my harness and all the clippy things and stash them in the bottom of the pack. It’s time to get back to the fun part. It may not be all that glamorous, but hopefully, these skills can give you the confidence to tackle some new lines, and have a good time doing it.