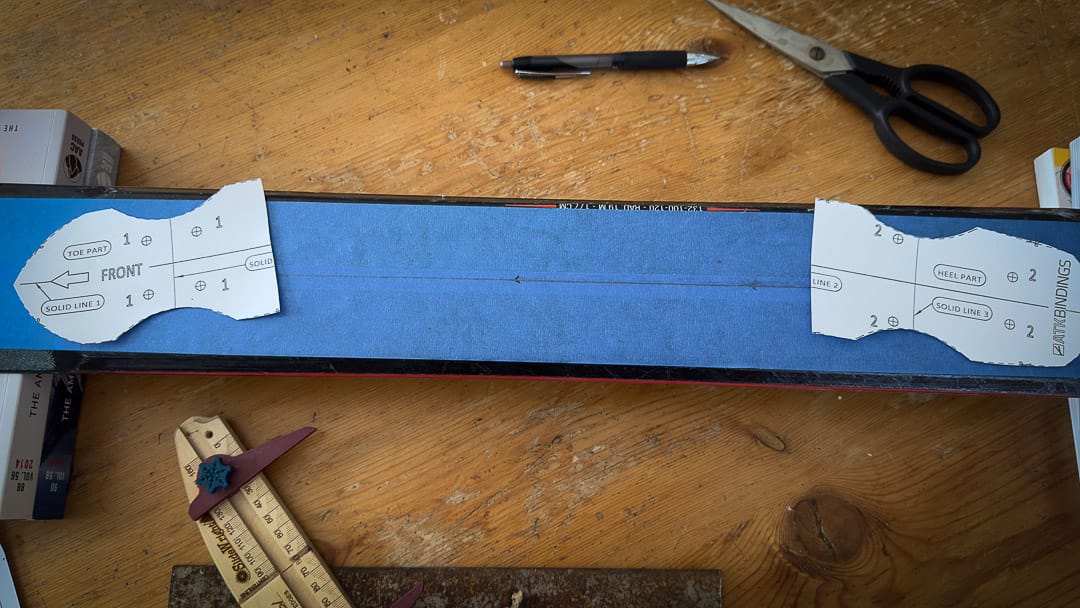
During a quite good conversation last weekend, the topic pivoted to self-mounting tech bindings… with a paper jig. Many longtime Internet denizens know a time when Dynafit jigs were scarce, or when we were collectively either DIY-focused or just short of the cash, and self-mounted bindings with a paper jig from Lou Dawson or deep in some online forum. I’ll wager it’s safe to say most of us who have done the deed have misfired on something in the multi-step process of using a paper jig. Some might say paper-jig mounting is a rite of passage. Some may say pony up the $ and pay a well-respected shop with a proper jig. With a nod to Fleetwood Mac: “Go your own way.”
We could, however, run through the myriad ways one could screw up a paper-jig guided mount. Here are but a few: You print the paper template at the wrong scale; the paper template and center line (drawn on the topsheet) do not perfectly align… make sure the centerline is, in fact, right down the center. Maybe you didn’t use a binding-mount-specific drill bit with a stop, so you drilled through the ski. I have seen with my own eyes two skis with eight holes per ski straight through from topsheet to base—as in through the base. The backstory is this: A great friend was mounting his partner’s skis for her birthday (some iteration of BD Helio Carbon), and he made the mistake. The relationship survived, and I’d say it is still thriving.